Introduction
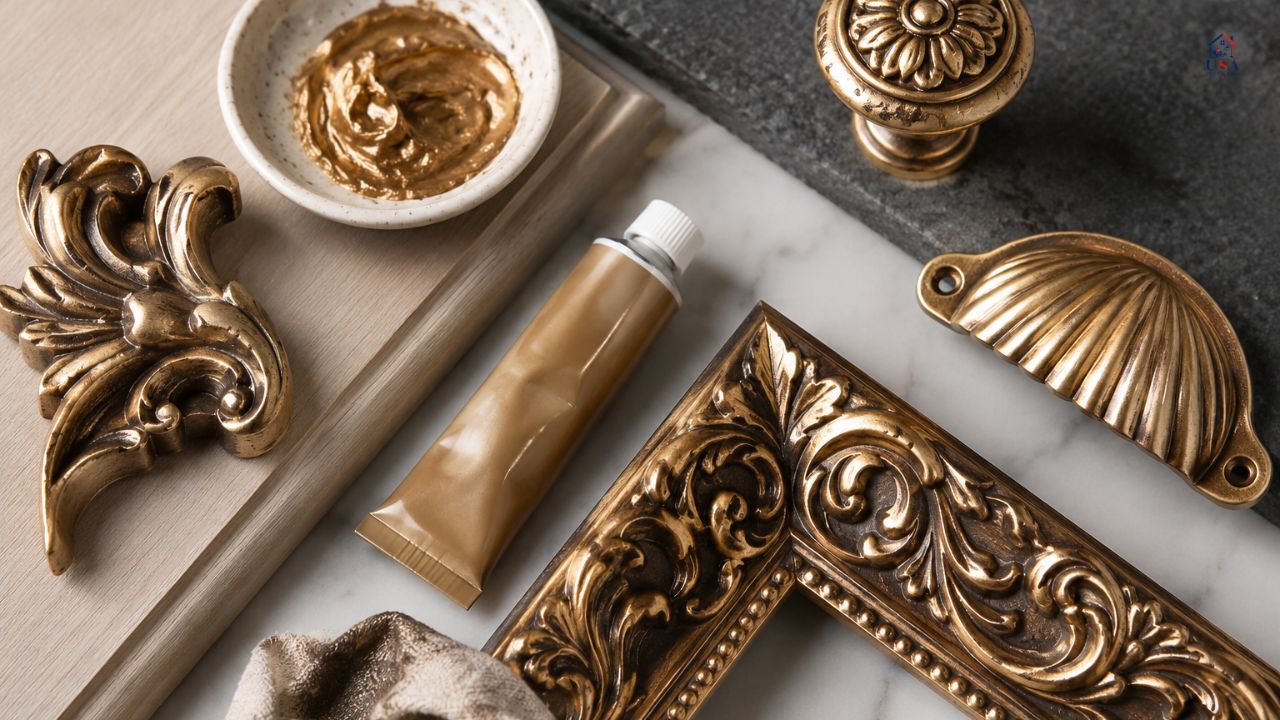
A tiny tube of metallic wax can completely change the look of a frame, lamp, mirror, handle, tray, or thrift-store find. That is why learning how to use rub n buff is such a useful skill for DIY decorators, furniture flippers, and anyone who wants a rich metallic finish without complicated tools.
The magic is in the simplicity. You rub it on, let it set, then buff it to a soft shine. But the difference between a streaky finish and a beautiful aged-metal look often comes down to surface prep, timing, color choice, and how lightly you apply it.
Whether you searched how to apply rub n buff, rub n buff instructions, or rub and buff how to use, this guide walks you through everything clearly, from basic application to dry time, colors, surfaces, mistakes, and project ideas.

What Is Rub n Buff?
What is rub n buff? Rub n Buff is a wax-based metallic finish used to add color, shine, and an aged-metal effect to surfaces such as wood, metal, plastic, painted furniture, frames, hardware, and home decor pieces.
People often spell it different ways, including rub n buff, rub and buff, rub n’ buff, rubnbuff, ruff and buff, and rub and buff paint. In most DIY conversations, they all refer to the same style of metallic wax finish.
Unlike spray paint, it does not require heavy masking or a large workspace. Unlike traditional paint, it is usually applied in very thin coats with a fingertip, cloth, brush, or sponge. The product is popular because a small amount goes a long way and the finish can look surprisingly realistic when applied with patience.
How Does Rub n Buff Work?
How does rub n buff work? It works by depositing metallic pigment and wax onto the surface. As the wax sets, it bonds lightly to the material. When you buff it, the finish becomes smoother and shinier.
This is why thin coats matter. If you apply too much at once, the wax can stay tacky, smear, or collect in corners. A light coat creates better control and a more natural finish.
Many beginners ask how do you use rub and buff or how do you rub n buff because the product looks almost too simple. The best approach is to treat it like a finishing wax, not like thick paint. You are building color gradually instead of covering everything in one heavy pass.
How to Use Rub n Buff
Here is the basic method for how to use rub n buff on most surfaces.
- Clean the surface well.
- Lightly sand glossy surfaces.
- Remove dust with a dry cloth.
- Apply a tiny amount of product.
- Rub it in using circular motions.
- Let it dry.
- Buff gently with a clean soft cloth.
- Add another thin coat only if needed.
The biggest beginner mistake is using too much. A pea-sized amount can cover more than you expect. For small details, even less is better.
If you searched rub n buff directions, rub and buff directions, rub and buff instructions, rub n buff application, or using rub n buff, the most important rule is simple: apply thin, let it set, then buff.
How to Apply Rub n Buff Correctly
To understand how to apply rub n buff, think in layers. The first layer grabs the surface. The second layer, if needed, deepens the color. Buffing creates the final sheen.
For detailed pieces, use a cotton swab, small artist brush, or gloved fingertip. For flat areas, a lint-free cloth gives smoother results. For raised edges, apply lightly so the color catches the high points and creates a naturally aged look.
When learning how to rub and buff, do not press too hard at first. Gentle pressure helps spread the product evenly. After it dries, stronger pressure during buffing brings out the shine.
Surface Prep Before Applying Rub n Buff
Good prep makes a huge difference. Before any rub n buff tutorial can work well, the surface needs to be clean and dry.
For dusty decor, wipe with a microfiber cloth. For greasy metal or hardware, use mild soap and water, then dry fully. For glossy plastic or slick painted pieces, lightly scuff the surface with fine-grit sandpaper so the wax has something to grip.
If you are doing rub n buff before and after projects, prep is usually the reason the “after” looks professional. A clean surface helps the product spread evenly and reduces patchy spots.
How Long Does Rub n Buff Take to Dry?
A common question is how long does rub n buff take to dry. In many normal indoor conditions, it becomes touch-dry fairly quickly, often within minutes, but it is best to give it longer before heavy handling.
For practical DIY use, wait at least 15–30 minutes before buffing lightly. For pieces that will be touched often, allow several hours or overnight before regular use.
Searches like rub n buff dry time, rub and buff dry time, rub n buff how long to dry, how long for rub n buff to dry, and how long does it take rub and buff to dry all point to the same concern: avoiding smudges. The safest answer is to let it cure longer when durability matters.
Does Rub and Buff Come Off?
Does rub and buff come off? It can come off if the surface was dirty, too glossy, handled too soon, or exposed to heavy wear without protection. It is more durable on decorative pieces than on high-touch surfaces.
On hardware, handles, faucets, or frequently used objects, the finish may wear over time. That is not always a bad thing if you want an antique look, but it may need touch-ups.
For better durability, apply very thin coats, allow proper drying time, and consider a compatible clear protective topcoat after testing.
Can You Use Rub n Buff on Wood?
Yes, can you use rub n buff on wood is one of the most common beginner questions. It works well on raw wood, stained wood, painted wood, carved wood, picture frames, furniture trim, and decorative details.
For rub n buff on wood, the surface should be smooth and dust-free. Raw wood may absorb more product, while sealed or painted wood lets the metallic finish sit more on top.
If you are wondering how to use rub n buff on wood, start with a very small amount and work it into the grain. On carved details, let the product collect lightly in raised areas for an aged finish.
Rub n Buff on Painted Wood
How to use rub n buff on painted wood is slightly different from using it on raw wood. Painted wood usually gives a cleaner metallic effect because the base color influences the final look.
Black paint under gold creates a dramatic antique finish. White paint under silver looks softer and brighter. Deep brown under antique gold feels warm and vintage.
For best results, make sure the paint is fully dry before applying the wax. If the paint is glossy, lightly scuff it first. This helps rub n buff on painted wood adhere better.
Rub n Buff on Metal
Rub n buff on metal is excellent for lamps, frames, knobs, pulls, hinges, candle holders, and decorative accents. It is especially useful when you want to refresh dull or mismatched metal without replacing it.
For rub n buff on metal, cleaning is essential. Metal often has oil, fingerprints, polish residue, or old grime that can stop the wax from bonding evenly.
If you searched how to use rub n buff on metal, wipe the metal clean, dry it fully, apply a thin coat, then buff after it sets. For slick metal, lightly sanding can improve adhesion.
Rub n Buff on Plastic
Many DIYers ask how to use rub n buff on plastic because plastic can be tricky. The answer is yes, but prep matters more than usual.
Plastic should be clean, dry, and lightly scuffed. Smooth plastic may resist the product if it is too shiny. A primer or base coat can help if the item will be handled often.
Use thin coats and give the finish extra drying time. Plastic projects often look best when the wax is applied over a painted base rather than directly on slick plastic.
Rub n Buff on Paint
Rub n buff on paint works beautifully when the painted surface is fully cured. It can add metallic highlights to furniture, frames, cabinets, moldings, and decor pieces.
If the paint is matte or chalky, Rub n Buff usually grips well. If the paint is glossy, a light sanding helps. Always test a hidden area first, especially if the painted item has a delicate or unknown finish.
People searching rub and buff paint or rub n buff paint are often trying to compare it with regular paint. The key difference is that Rub n Buff is a finishing wax, not a full-coverage wall or furniture paint.
Rub n Buff Gold Finishes
Gold is one of the most popular choices. Searches like gold rub and buff, gold rub n buff, rub n buff gold, and gold rub n buff on wood usually come from people trying to get a vintage brass or gilded look.
Gold shades can look different depending on the base color. Over black, gold appears aged and dramatic. Over white, it looks brighter. Over brown or red undertones, it can feel warmer and more antique.
Antique Gold Rub n Buff
Antique gold rub n buff, rub n buff antique gold, rub and buff antique gold, and rub and buff antique gold finishes are ideal when you want a softer old-world look instead of bright yellow gold.
This color is often used on mirror frames, ornate furniture trim, candle holders, drawer pulls, and decorative molding. It works especially well when you apply it lightly over raised details rather than covering the whole piece heavily.
If you want the finish to look authentic, leave a little of the darker base color visible in corners and recessed areas.
Gold Leaf and Silver Rub n Buff
Rub n buff gold leaf and rub n buff gold leaf finishes create a brighter gilded look. They are popular for frames, signs, holiday decor, and accent pieces.
Silver rub and buff and silver rub n buff are great for cooler interiors, modern hardware, chrome-like accents, and restoring decorative metal pieces. Silver can look clean and polished, but it can also look aged if applied lightly over black or charcoal paint.
For a softer finish, buff silver gently. For stronger shine, buff with a clean cloth after the wax has had time to set.
Black and Ebony Rub n Buff
Rub n buff black, black rub n buff, black rub n buff on metal, and ebony rub and buff are useful when you want to deepen details, darken hardware, or create contrast.
Black finishes can make shiny objects look aged, industrial, or more expensive. They are also useful for toning down overly bright gold or silver. A little black wax in recessed areas can make metallic finishes look more realistic.
Use black sparingly at first. It is easier to add more than to remove excess.
Rub n Buff Colors
Rub n buff colors and rub and buff colors can range from bright metallics to antique tones and deeper accent shades. The best color depends on the project style.
Choose gold or antique gold for vintage warmth. Choose silver for a cooler metal look. Choose black or ebony for aging, shading, or dramatic hardware updates. Choose gold leaf for a brighter decorative finish.
The surface color underneath also matters. The same tube can look very different over white, black, brown, raw wood, or painted metal.
Where to Buy Rub n Buff
People often search rub n buff near me, rub and buff near me, rub n buff home depot, rub n buff hobby lobby, rub n buff michaels, and rub n buff target when planning a project.
Availability can vary by location, but craft stores, hardware stores, home improvement stores, and online marketplaces commonly carry metallic wax finishes. Check the exact color before buying because antique gold, gold leaf, silver, black, and ebony can look quite different.
Rub n Buff Projects
There are endless rub n buff projects for beginners and experienced DIYers. Try it on picture frames, mirrors, lamp bases, cabinet knobs, drawer pulls, trays, candle holders, furniture trim, curtain rods, planters, or small sculptures.
It is especially good for budget makeovers. A dated item can look custom with just a small amount of product and careful buffing.
For realistic rub n buff before and after results, photograph the item before cleaning, after applying the first coat, and after buffing. This shows how much the finish changes during the process.
How to Buff Rub n Buff
Learning how to buff rub n buff is just as important as applying it. Buffing smooths the finish, removes excess wax, and brings out the shine.
Use a clean, soft, lint-free cloth. Wait until the product has set, then rub gently in small circles. If the finish smears, it needs more drying time. If it looks dull, buff a little longer.
For detailed pieces, use a cotton swab or soft brush to buff corners and grooves without removing too much product.
Rub n Buff Before and After Tips
A successful rub n buff before after transformation usually comes from restraint. The finish looks more natural when it is layered lightly.
Do not cover every recessed area if you want an aged look. Let shadows remain in cracks, corners, and carved details. This creates depth.
If the piece looks too bright, tone it down with a darker wax or apply a small amount of black or ebony to recessed areas. If it looks too dark, add a light touch of gold or silver on the raised edges.
Common Mistakes to Avoid
The most common mistake is applying too much product. Rub n Buff performs best in thin layers.
Another mistake is skipping surface prep. Dust, oil, gloss, and old residue can all affect the final finish.
A third mistake is buffing too soon. If the surface is still tacky, wait longer. Searches like how long does rub n buff take, how long does rub n buff take to dry, and how long does it take rub and buff to dry usually come from people dealing with smudging or transfer.
Rub n Buff Instructions for Best Results
These simple rub n buff instructions work for most projects:
- Clean the item thoroughly.
- Sand glossy surfaces lightly.
- Wear gloves to avoid stained fingers.
- Apply less product than you think you need.
- Work in small sections.
- Let the wax set before buffing.
- Use a clean cloth for final polishing.
- Seal only after testing if the piece needs extra protection.
If you searched rub and buff instructions or rub n buff directions, this is the practical routine to follow.
FAQ
What is the easiest way to learn how to use rub n buff?
The easiest way to learn how to use rub n buff is to start on a small decorative item, such as a frame or knob. Clean it, apply a tiny amount, let it dry, and buff gently.
How to apply rub n buff without streaks?
Use very thin coats and spread the product evenly. Streaks usually happen when too much wax is applied or when the surface is dirty, glossy, or uneven.
How long does rub and buff dry time usually take?
Rub and buff dry time depends on the surface, temperature, humidity, and thickness of the coat. It may feel dry quickly, but longer drying time is better before handling.
Can rub n buff be used on furniture?
Yes, it can be used on furniture details, trim, handles, legs, and decorative accents. For large high-touch surfaces, test first and consider a protective topcoat.
Is rub n buff good for antique gold finishes?
Yes. Rub n buff antique gold is one of the most popular choices for creating vintage, aged, or gilded effects on frames, mirrors, and hardware.
Can I use rub n buff on metal hardware?
Yes. Clean the metal first, scuff glossy surfaces if needed, apply thinly, and let it dry well before touching. This works well for decorative hardware updates.
Does rub and buff come off with use?
It can wear off on high-touch items, especially if the surface was not prepared well. For handles or frequently used pieces, sealing may improve durability.
What is the difference between rub n buff gold and gold leaf?
Rub n buff gold often gives a warm metallic look, while rub n buff gold leaf usually appears brighter and more gilded. The final result also depends on the base color.
Where can I find rub n buff near me?
Search local craft stores, home improvement stores, and online retailers. Common searches include rub n buff home depot, rub n buff hobby lobby, rub n buff michaels, and rub n buff target.
Conclusion
Once you understand how to use rub n buff, it becomes one of the easiest ways to refresh decor, hardware, furniture details, and small DIY projects. The secret is not complicated: clean the surface, use less product than you think, apply thin layers, allow enough drying time, and buff patiently.
From antique gold rub n buff to silver, black, ebony, and gold leaf finishes, the product gives you a lot of creative control in a small tube. Whether you are updating metal hardware, adding warmth to wood, or giving plastic decor a more expensive look, Rub n Buff can deliver a beautiful finish when used with care.