Imagine walking into a living room where the walls feel alive—floor-to-ceiling shelves framing a fireplace, lower cabinets tucked neatly beneath, books and décor arranged just so. That kind of built-in magic used to require a hefty contractor budget. But here’s the thing: DIY built ins are more achievable than you think, and thousands of homeowners are pulling them off every weekend with little more than stock cabinets, basic tools, and a solid plan.
Whether you’re eyeing the living room wall that’s been begging for purpose, dreaming of a home office lined with custom shelving, or simply want to add serious resale value to your home, building built-in cabinets is one of the most rewarding home improvement projects you can tackle yourself. The result? A space that looks custom-designed, feels intentional, and cost a fraction of what a carpenter would charge.
In this guide, we’ll walk through everything—from planning and material selection to step-by-step construction tips for built-in bookshelves, cabinets, and shelving units across every room. Whether you’re a seasoned DIYer or picking up a drill for the first time, you’ll find actionable guidance here.
Why DIY Built-In Cabinets Are Worth Every Bit of Effort
Before we get into the how-to, let’s talk about the why. Built-in cabinets and shelving aren’t just aesthetic upgrades—they’re functional investments. Unlike freestanding furniture, built ins integrate with your home’s architecture, making rooms appear larger, more organized, and polished. They use otherwise dead wall space and provide storage that can be completely customized to your family’s needs.
From a financial standpoint, custom built ins installed by a professional cabinetmaker can run anywhere from $2,000 to $10,000 or more depending on the size and complexity. DIY built in cabinets, by contrast, often cost between $300 and $1,500 for the same footprint—especially when you leverage stock cabinets from home improvement stores like Home Depot or IKEA.
What Makes Built Ins Different From Regular Furniture
A built-in unit is anchored to the wall, floor, or ceiling. It’s designed to look like it was always part of the home. Unlike a bookshelf you’d buy at a furniture store, built-in bookshelves have no visible gaps at the sides, no wobble, and no risk of tipping. They follow the room’s lines. They look intentional.
Built in cabinets for living rooms, offices, and kitchens typically feature a combination of upper shelving (open or with glass doors) and lower base cabinets with solid doors. This combination creates visual balance, maximizes storage, and allows for a variety of display and concealment options.
The Real Savings Behind DIY Built Ins With Stock Cabinets
One of the most popular approaches to creating custom-looking results on a budget is using DIY built ins with stock cabinets. Stock cabinets from big-box stores come in standard sizes and are designed to be assembled and installed by homeowners. By arranging them thoughtfully, adding trim, crown molding, and a painted finish, you can make stock cabinets look like high-end built-in cabinetry that cost three times as much.
- IKEA BILLY and SEKTION cabinets are popular bases
- Home Depot and Lowe’s carry RTA (Ready-to-Assemble) stock cabinets
- Adding face frames and trim creates a built-in, furniture-quality look
- A fresh coat of paint in a consistent color ties everything together
Planning Your DIY Built In Project
Good planning is the secret ingredient of any successful DIY built in project. Rushing into a build without measuring, sketching, and thinking through the details is the fastest path to frustration. Take your time in the planning phase—it will save you hours of rework later.
Measuring and Mapping the Space
Start by measuring the wall width, ceiling height, and any architectural features like outlets, light switches, vents, or baseboards. Sketch the wall to scale on graph paper or use a free app like SketchUp or Planner5D. Note the distance from the floor to the ceiling, since many older homes have uneven floors and ceilings that will require shimming or scribing.
For built-in bookshelves with cabinets, a standard configuration includes base cabinets at 34.5 inches (plus countertop), with the upper section extending to the ceiling. This creates the classic floor-to-ceiling look. If ceiling height varies, plan for a built-up cornice or crown molding to fill the gap at the top.
Choosing the Right Cabinet Configuration
The most common configuration for living room built in cabinets is base cabinets on the bottom and open shelving above. Base cabinets for built ins typically range from 12 to 24 inches deep, while upper sections are shallower—usually 10 to 12 inches—to keep the wall profile from becoming too dominant.
Here are some popular layouts:
- Full wall unit: Floor-to-ceiling shelves with base cabinets below
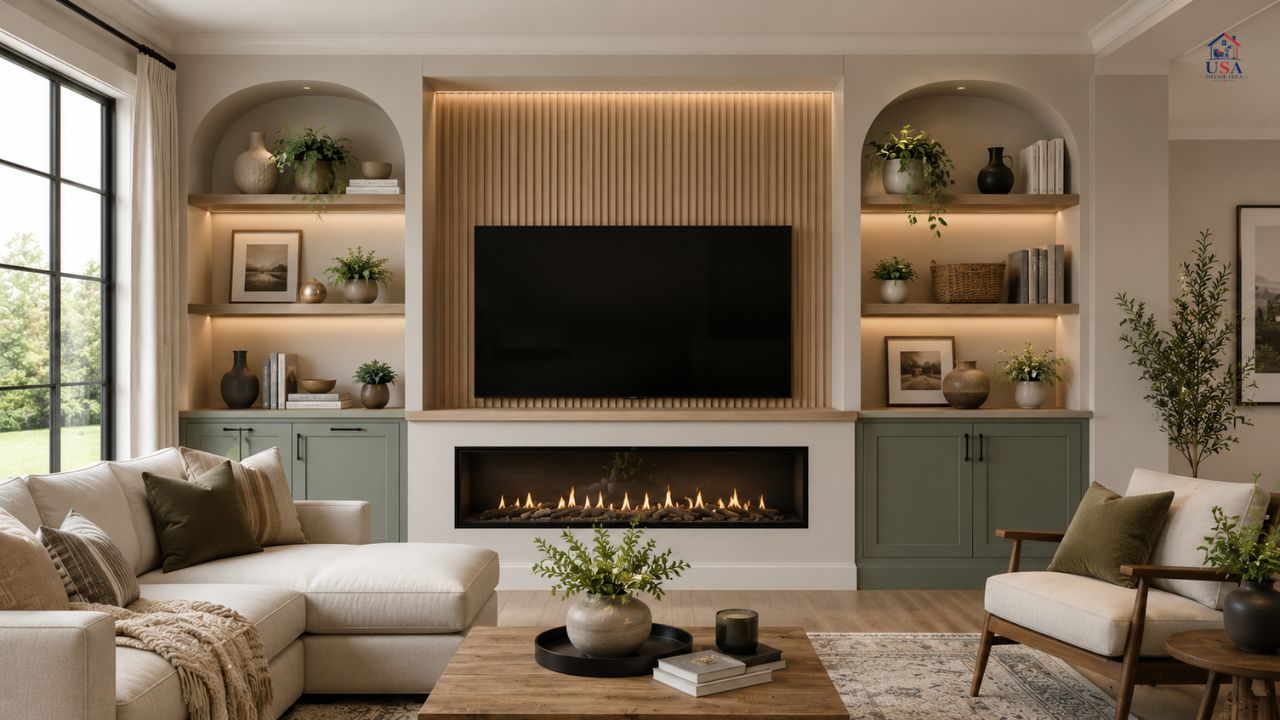
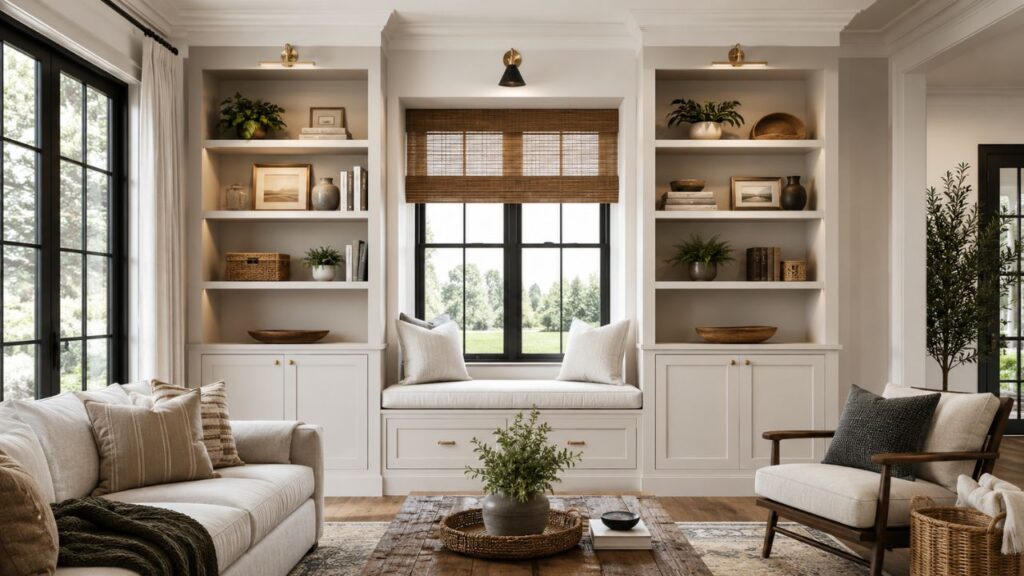
- Flanking fireplace: Symmetrical built ins on either side of a fireplace
- Corner units: L-shaped configurations that wrap around a corner
- Built ins around TV: Central TV panel flanked by bookshelves and lower cabinets
- Office alcove: Built-in desk with overhead cabinets and flanking bookshelves
Materials: What to Use for DIY Built Ins
For most DIY built-in cabinets and shelves, plywood is the material of choice. It’s strong, stable, and takes paint well. Three-quarter-inch plywood is standard for shelves, cabinet sides, and backs. For a smoother painted finish, use MDF (medium-density fiberboard) for doors and face frames.
If you’re using prefab built-in cabinets or stock cabinets for built ins, the carcasses are already built. Your main materials will be:
- Solid wood or MDF for face frames and trim
- Crown molding and base molding to tie everything in
- Wood filler and caulk for seamless transitions
- Primer and paint—typically a semi-gloss or satin finish for durability
How to Build Built-In Cabinets: Step-by-Step
Ready to get your hands dirty? Here’s a straightforward approach to how to build built-in cabinets using stock cabinets as the base—the method that combines ease of construction with a professional-looking result.
Step 1 – Prepare the Wall
Remove baseboard molding from the area where your built ins will go. If you’re adding outlets or repositioning them, do that now before any cabinets go in. Locate and mark all wall studs—you’ll be anchoring cabinets to these for stability.
Step 2 – Install Base Cabinets
Begin with the base cabinets. Level each cabinet carefully, using shims under the cabinet base as needed. Screw each cabinet to the wall through the back panel, hitting at least two studs. Secure adjacent cabinets to each other by drilling through the face frames or cabinet sides.
For a DIY built-in bookcase with base cabinets, place the cabinets in their final positions, confirm they’re level and plumb, then anchor them securely. If you’re filling a recess or alcove, measure precisely so the cabinets sit flush with surrounding walls.
Step 3 – Add a Countertop or Filler Panel
Once the base cabinets are in, add a countertop surface above them. This might be a plywood panel, a butcher block off-cut, or a painted MDF panel. This surface bridges the tops of the base cabinets and creates the transition to the upper shelving section.
Step 4 – Build and Install Upper Shelving
For the upper section, you can use additional wall cabinets (with or without doors), build a simple plywood box from scratch, or use open shelf standards. How to build built-in bookshelves at this stage is primarily about building a vertical framework—a plywood carcass—and then adding shelves on adjustable shelf pins.
Secure the upper section to wall studs through the back panel. If the upper cabinets reach the ceiling, screw them to ceiling joists if possible, or add a ledger board at the ceiling and attach to that.
Step 5 – Add Face Frames and Trim
This is where DIY built-in cabinets go from looking like a stack of store-bought boxes to looking like custom built-in cabinetry. A face frame—strips of solid wood glued and nailed to the front edges of the cabinet carcasses—covers the raw plywood edges and creates a furniture-like appearance.
Follow the face frame with base molding at the floor, crown molding at the ceiling (or top of the unit if not going to the ceiling), and any vertical trim strips on the sides. Use wood filler to fill nail holes and caulk to seal the gap between the unit and the wall.
Step 6 – Paint and Finish
Sand everything smooth, prime with a good bonding primer, and paint in your chosen color. White and off-white are classic choices for built-in shelving, but navy, sage green, black, and warm greiges are all trending. Two or three coats of semi-gloss paint will give you a durable, cleanable surface.
DIY Built-In Bookshelves: Design Tips and Tricks
DIY built-in bookshelves are among the most popular built-in projects—and for good reason. They add character to a room, provide a home for books and decorative objects, and can anchor a space the way few other furniture pieces can.
Getting the Proportions Right
Proportion is everything with built-in bookshelves. The classic rule is that shelves should be no wider than 36 inches without a center support—wider spans tend to sag under the weight of books. Shelf depth of 10 to 12 inches is ideal for a standard bookshelf; deeper shelves on lower sections (12 to 16 inches) allow for larger objects or baskets.
Built-In Bookshelves Around TV
One of the most dramatic living room built-in ideas is building bookshelves on either side of a television. The TV becomes the focal point, flanked by symmetrical columns of shelves above and closed cabinets below—a design that’s both functional and visually stunning.
For built-in bookshelves around TV setups, plan the central TV section first. Decide whether the TV will be wall-mounted, recessed, or sitting on a shelf. Then plan the flanking bookshelf columns accordingly. Ensure cable management is part of the plan from the beginning.
How to Make Built-In Bookshelves Look Custom
The difference between a DIY bookcase that looks homemade and one that looks professionally built comes down to a few details:
- Consistent reveal: Make sure face frame pieces overlap cabinet boxes by the same amount everywhere
- Tight caulk lines: A thin, smooth bead of paintable caulk where the unit meets the wall makes everything look seamless
- Matching trim profiles: Use the same molding profile throughout for a cohesive look
- Adjustable shelves: Pin holes allow flexibility and prevent the static look of fixed shelves
- Interior paint color: Painting the inside of open shelves a contrasting or accent color adds depth and sophistication
Living Room Built-In Cabinets: Ideas for Every Style
The living room is where built ins truly shine. Whether your style is modern and minimal, traditional and cozy, or somewhere in between, living room built-in cabinets can be adapted to fit seamlessly.
Traditional Living Room Built Ins
Traditional built ins typically feature raised-panel cabinet doors, detailed crown molding, and a classic painted finish—often white or cream. Symmetry is key: matching bookshelf units flanking a fireplace, for example, or a centered entertainment unit with identical side columns.
Modern and Minimalist Built Ins
Modern built-in cabinets for living rooms favor clean lines, minimal molding, and often a flat-front door style. Floating shelves integrated into a low-profile base cabinet create a sleek, mid-century-influenced look. Dark colors like charcoal or black add drama; white creates an airy, gallery-like feel.
Farmhouse and Rustic DIY Living Room Built Ins
Shiplap backing inside open shelves, beadboard panels on cabinet doors, and warm-toned wood accents give farmhouse-style DIY living room built ins their cozy character. Open shelving predominates in this style—closed cabinets feel too formal for the farmhouse aesthetic.
Built-In Cabinets in Other Rooms: Beyond the Living Room
Built ins aren’t limited to the living room. Every room in the house can benefit from thoughtfully designed built-in storage and display solutions.
DIY Built-In Office Cabinets
Home offices are ideal candidates for built-in cabinetry. DIY built-in office cabinets typically combine a central desk section with overhead cabinets and flanking bookshelf columns. This maximizes vertical space in what’s often a small room and creates a dedicated, professional-feeling workspace.
Use base cabinets as the desk’s support structure, with a solid wood or butcher block countertop spanning the width of the workspace. Add upper cabinets or open shelves above for reference books, files, and supplies.
Basement Built-In Cabinets
Basements benefit enormously from built-in storage. Basement built-in cabinets can transform an unfinished or underutilized space into a tidy home theater room, a functional workshop, or a games room with ample concealed storage.
Moisture is a concern in basements—use moisture-resistant MDF or solid wood (rather than standard particleboard) for any built ins near below-grade walls, and ensure adequate ventilation behind base cabinets.
Kitchen Built-Ins and Pantry Storage
Kitchen built-in cabinets are essentially what your kitchen already has—but extended or customized to fill awkward gaps, add a pantry, or create a built-in breakfast nook with bench storage. A floor-to-ceiling pantry built in next to existing cabinetry is one of the highest-value kitchen upgrades you can make yourself.
Dining Room and Bonus Room Built Ins
Dining rooms benefit from built-in hutches or sideboards—pieces that combine open display shelving above with closed cabinet storage below. A built-in hutch flanking a dining room window can make the space feel like a room from an architectural magazine.
Bonus rooms—those extra spaces that aren’t quite a bedroom or living room—are perfect for flexible DIY built ins that might incorporate a Murphy bed, a fold-down desk, or a combination of shelving and entertainment storage.
How to Make Cabinets Look Built In Without Starting From Scratch
Not every project requires building from the ground up. If you have existing freestanding bookcases or stock cabinets, there are several techniques for how to make cabinets look built in and achieve that seamless, custom appearance.
Using Prefab or Stock Cabinets
Stock cabinets from a home improvement store already have the structural bones of a built-in. The transformation comes from anchoring them to the wall, adding a matching face frame, and trimming everything out with molding. Using stock cabinets for built ins is one of the most cost-effective approaches available.
The Faux Built-In Approach
Faux built-in cabinets use paint and molding to make freestanding pieces look integrated. By painting the cabinet the same color as the wall, adding a crown molding cap at the top, and placing a baseboard skirt around the bottom, you create the illusion of a built-in without any anchoring or major carpentry.
Using Upper Cabinets as Base Cabinets
One popular budget trick is to use upper wall cabinets as base cabinets. Because upper cabinets are shallower (typically 12 inches deep versus 24 inches for base cabinets), they’re perfect for creating slimmer built-in bookshelf columns or office shelving units. They’re also usually cheaper per cubic foot of storage than base cabinets.
Common Mistakes to Avoid With DIY Built-In Cabinets
Even experienced DIYers make avoidable mistakes when building built ins. Here are the most common pitfalls and how to sidestep them.
- Not accounting for out-of-plumb walls: Older homes especially have walls that aren’t perfectly flat or vertical. Always check for plumb and level before securing anything permanently.
- Skipping the face frame: The face frame is what transforms a cabinet box into furniture. Don’t skip it.
- Underestimating the trim: Buying too little molding and having to make extra trips to the hardware store is a frustrating time-waster. Buy 20% more than you think you need.
- Forgetting cable management: For any built in that will house electronics, plan cable pathways before construction begins.
- Rushing the paint job: The finish is what people see. Take time to sand properly, use a quality primer, and apply at least two finish coats.
Frequently Asked Questions
What is the easiest way to make DIY built-in cabinets?
The easiest approach is to use pre-made stock cabinets from a home improvement store as the foundation. Install base cabinets, add a countertop or filler panel, and stack upper cabinets or open shelves on top. Add face frames and trim molding, caulk the gaps, and paint everything the same color. This method—sometimes called DIY built ins with stock cabinets—produces a very convincing custom look without requiring advanced woodworking skills.
How much do DIY built-in bookshelves cost?
The cost of DIY built-in bookshelves varies widely based on materials and size. A basic bookshelf unit built from plywood might cost as little as $200–$400 in materials. A full wall of built-in bookshelves with cabinets using stock cabinets could range from $600 to $1,500. Professional installation of comparable custom built ins would typically cost $3,000–$8,000 or more.
Can I build built-in bookshelves without carpentry experience?
Yes—especially if you use the stock cabinet method. The most basic skills required are measuring accurately, using a level, operating a drill, and applying caulk and paint. If you can hang a picture frame and drive a screw into a stud, you have the fundamental skills to tackle a basic DIY built-in project. More complex builds (angled ceilings, curved walls, inset doors) do require more advanced skills.
What is the best wood for DIY built-in cabinets?
For painted built-in cabinets, 3/4-inch birch plywood is the go-to choice for structural panels, while MDF is preferred for flat panel doors and face frames due to its smooth surface. For stained or natural-wood built ins, hardwood plywood with oak, maple, or walnut veneer is a better choice. Solid hardwood is typically reserved for face frames and trim on budget-conscious projects.
How do I make built-in shelves look custom?
The details make all the difference. Use a consistent face frame with an equal reveal on all sides, add crown molding at the top and base molding at the bottom, fill all nail holes with wood filler, caulk every gap where the unit meets the wall, and apply a quality satin or semi-gloss paint. Painting the interior of open shelves a different (usually darker) shade from the exterior adds depth and a high-end feel.
Can I add built-in bookshelves to a rental property?
In most cases, renters should avoid permanent built ins since they involve anchoring into walls and potentially altering the space. However, some renters create faux built-in looks with freestanding bookcases flanked by trim molding attached only with removable adhesive strips. Always get landlord approval before making any structural modifications.
What is the standard depth for built-in bookshelves?
The standard depth for built-in bookshelves is 10 to 12 inches for a typical book collection. Base cabinets in a built-in unit are usually deeper—12 to 24 inches—depending on how much depth the room allows and whether the base cabinets need to accommodate large items. Deeper shelves (14–16 inches) work well for displaying art objects, plants, and oversized books.
How long does it take to build DIY built-in cabinets?
A simple built-in unit using stock cabinets can often be completed over a weekend—one day for cabinet installation and framing, the second day for trimming, caulking, and painting. A larger, more complex built-in project—like a full living room wall of built-in cabinets and bookshelves—might take two to three weekends depending on your experience level and the scale of the build.
Conclusion
There’s something deeply satisfying about standing back and looking at a wall of built-in shelving and knowing you built it yourself. DIY built ins transform rooms, add real value to homes, and make everyday spaces feel intentional and put-together. And thanks to the abundance of stock cabinet options, tutorial resources, and quality tools available today, building built-in cabinets has never been more accessible.
Whether you’re planning a dramatic floor-to-ceiling library wall, a tidy home office setup, or simply a pair of flanking bookshelves on either side of a fireplace, the process is the same: measure carefully, plan thoroughly, choose materials wisely, and take the finishing details seriously. The difference between a built-in that looks homemade and one that looks professionally done is almost always in the trim, the paint, and the patience.
Start small if you need to. A single column of shelves over a base cabinet is a manageable weekend project that will build your skills and confidence. Before long, you’ll be planning your next built-in project—and maybe even helping a friend plan theirs.