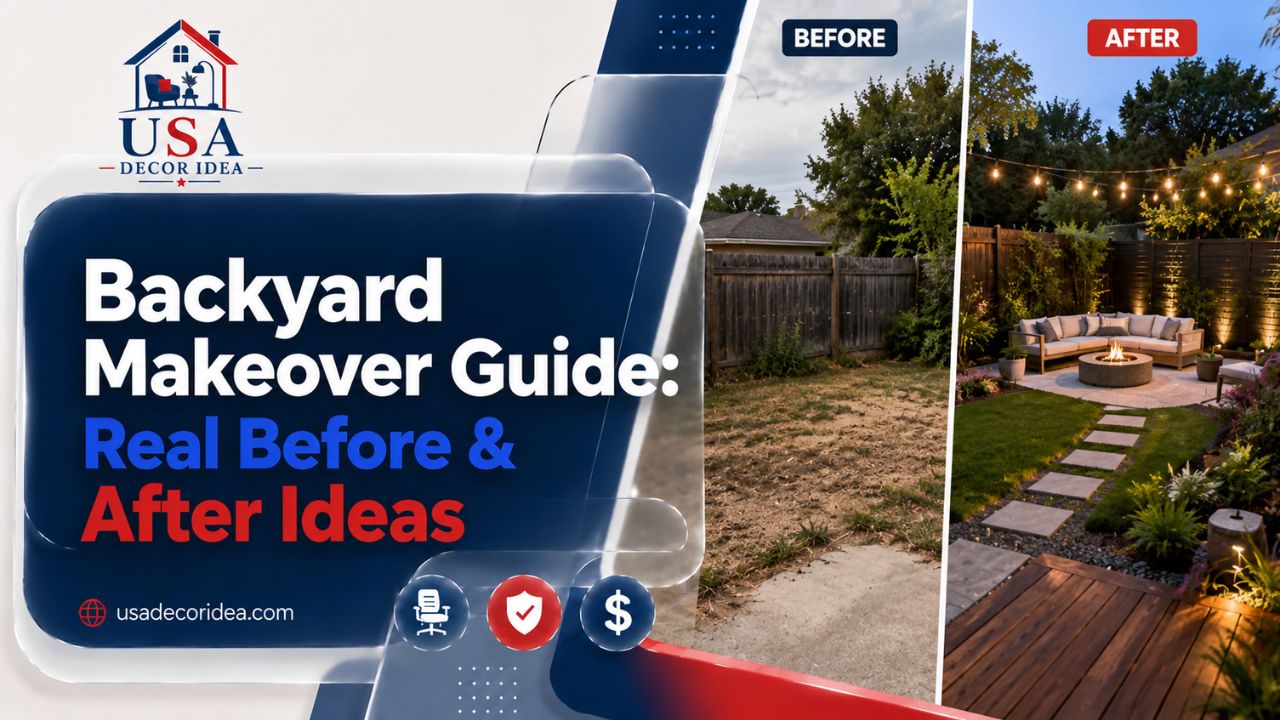
A few summers ago, I helped a neighbor tackle her backyard makeover after years of staring at a patch of crabgrass and a sagging fence. We didn’t have a landscape architect on speed dial or a five-figure budget. What we had was a weekend, a rented sod cutter, and a Pinterest board full of ideas that mostly didn’t apply to our soil, our climate, or our budget. Sound familiar?
That’s the thing about backyard renovations — everyone shows you the glossy after photo, but almost nobody walks you through the actual decisions, the trade-offs, or the mistakes that almost derailed the project. This guide is the one I wish we’d had. It’s built around real before and after backyard makeover experiences, practical budgeting, and the kind of patio ideas that survive more than one Pinterest scroll.
Whether your yard is a blank slate, a wooded mess, or a 1990s patio that’s seen better days, you’ll find something here that applies to your situation.
Why So Many Backyard Makeovers Fail Before They Start
Most backyard remodel projects don’t fail because of bad taste. They fail because of planning gaps. People buy plants before they understand their drainage. They pour a patio slab before thinking about where the grill smoke will blow. They start a backyard landscaping before and after project with Instagram inspiration and no actual measurements.
Here’s the uncomfortable truth: a successful backyard makeover is 70% planning and 30% execution. The fun part — picking furniture, planting flowers, hanging string lights — comes last, not first.
Before you touch a shovel, answer these questions:
- How do you actually want to use this space? (Dining, entertaining, gardening, kids, pets, quiet reading?)
- What’s your real budget, including a 15-20% buffer for surprises?
- What’s your soil and drainage situation?
- How much sun does the space get at different times of day?
- What’s staying and what’s going?
Skipping this step is the single biggest reason DIY backyard remodel projects stall halfway through, with half-finished patios and a pile of mulch nobody’s touched since June.
Setting a Realistic Budget for Your Backyard Makeover
This is where most homeowners get stuck. A full-scale backyard makeover from a professional design-build firm can run anywhere from $15,000 to well over $75,000 depending on hardscaping, lighting, irrigation, and structures. But that number scares off a lot of people who don’t realize how much can be done for far less.
If you’re working with a tighter budget, a low budget diy backyard makeover is absolutely achievable. I’ve seen homeowners transform tired yards for under $2,000 by being strategic about what they prioritize.
Where Your Money Should Go First
- Drainage and grading — invisible but non-negotiable. Skip this and everything else fails eventually.
- Hardscaping basics — a patio, walkway, or seating area sets the bones of the space.
- Privacy and structure — fencing, trellises, or a pergola frame the yard.
- Plants and softscaping — this is where personality comes in, and it’s also the cheapest category to phase in over time.
- Lighting and accessories — string lights, lanterns, and furniture come last because they’re easy to add later.
Cheap Backyard Makeover Ideas That Don’t Look Cheap
A lot of cheap backyard makeover ideas get dismissed because people assume “affordable” means “looks like a discount store.” It doesn’t have to. Some of the best low cost cheap backyard makeover ideas I’ve seen rely on repetition and restraint rather than buying more stuff.
A few that consistently deliver real results:
- Mulch beds with crisp edging. A defined bed edge instantly makes a yard look intentional, even with minimal planting.
- Gravel patios instead of poured concrete. A 10×12 gravel patio with a steel edge can cost a fraction of concrete or pavers.
- Repurposed pallet furniture. Sanded, stained, and cushioned, pallet benches look custom for almost nothing.
- Vertical gardens on a fence. Hanging planters or a simple trellis system adds green without taking up ground space.
- Secondhand furniture refresh. A $40 thrift-store bistro set with new spray paint and cushions often outperforms a $400 new set.
These low budget cheap backyard makeover ideas work because they focus on visual structure first — clean lines, defined edges, consistent materials — rather than trying to fill every corner with something new.
Patio Ideas That Actually Get Used
Here’s something landscape designers know that homeowners often don’t: the patio is usually the single most-used feature in any backyard renovation, more than the garden beds, more than the play area, more than the fire pit. So it deserves disproportionate attention.
When people search for patio ideas, they’re usually picturing pavers and umbrellas. But the real decision points are about scale, material, and flow.
| Patio Material | Approx. Cost per Sq Ft | Lifespan | Best For |
|---|---|---|---|
| Gravel | $1–$3 | 5–10 yrs (needs refresh) | Tight budgets, rustic look |
| Poured concrete | $6–$12 | 25–30 yrs | Clean modern look |
| Pavers | $10–$20 | 25–50 yrs | Flexibility, repair ease |
| Natural stone | $15–$30 | 50+ yrs | High-end, permanent feel |
| Stamped concrete | $12–$22 | 25 yrs | Decorative without paver cost |
A good rule of thumb from professional designers: size your patio for the furniture you actually own, plus three feet of walking clearance on every side. Most DIYers undersize patios and end up with a space where chairs scrape the grass when pulled out.
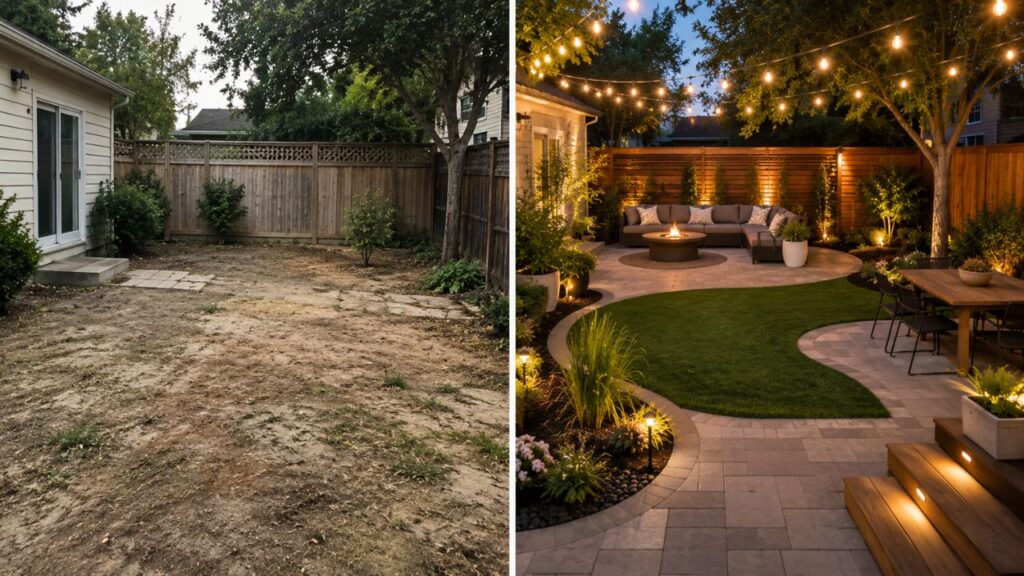
Real Before and After Backyard Makeover Stories
Numbers and tips only go so far. Let’s look at a few real-world scenarios that show how different starting points lead to very different — but equally successful — outcomes.
The Suburban Lawn Refresh
A homeowner in Ohio had a flat, unremarkable lawn with a single struggling tree. Her budget backyard makeover before and after came down to three moves: a curved mulch bed along the fence line, a 12×14 paver patio, and a defined seating zone with secondhand furniture. Total spend: just under $3,200. The before and after backyard makeover photos she shared showed the same square footage looking nearly twice as large simply because the new layout created visual zones instead of one open, undefined space.
The Wooded Backyard Transformation
A before and after wooded backyard project is a different animal entirely. Dense trees, root systems, and deep shade mean traditional lawn solutions usually fail. One family near Portland cleared selective underbrush, added a gravel path system winding between existing trees, and installed shade-tolerant plantings like ferns and hostas instead of fighting for grass. The result kept the wooded character intact while making the space usable — proof that a backyard landscaping before and after doesn’t always mean starting from scratch.
The Garden-Forward Renovation
Not every project is about patios and furniture. A garden renovation before and after can be just as transformative. One homeowner replaced an overgrown, weed-choked vegetable patch with raised cedar beds, drip irrigation, and gravel pathways between rows. The garden renovation before and after comparison showed not just better aesthetics but a measurable increase in vegetable yield, since raised beds improved drainage and soil quality.
Homeowner Yard Remodel Before After: What Changes the Most
When you study enough homeowner yard remodel before after examples, patterns emerge. The transformations that get the strongest reactions rarely involve the most expensive materials. They involve:
- Edge definition. Lawns blending into beds with no clear border read as “unfinished,” no matter how nice the plants are.
- Vertical layering. Yards with only ground-level plants look flat. Adding mid-height shrubs and taller features creates depth.
- Consistent materials. Mixing five different paver styles and three fence colors creates visual noise. Picking two or three materials and repeating them ties everything together.
- Negative space. Counterintuitively, leaving some open lawn or gravel area makes the planted areas look more intentional, not less.
This is the kind of information gain you won’t get from a quick scroll through inspiration photos — it comes from actually comparing dozens of projects side by side.
Planning Your DIY Backyard Renovations Step by Step
If you’re handling your own backyard renovations rather than hiring a full design-build team, sequencing matters more than most people expect.
Step 1: Clear and assess. Remove dead plants, old structures, and debris. This is also when you should test your soil pH and check drainage by watching where water pools after rain.
Step 2: Grade and plan drainage. Water should flow away from your home’s foundation. This step is invisible once finished but causes the most expensive failures when skipped.
Step 3: Install hardscaping. Patios, walkways, and retaining walls go in before plants, not after, to avoid damaging new landscaping with heavy equipment.
Step 4: Add structure. Fencing, pergolas, arbors, and privacy screens.
Step 5: Plant in layers. Trees and large shrubs first, then mid-size plants, then groundcover and annuals last.
Step 6: Finish with lighting and furniture. This is the fun part, and it’s also the most forgiving — easy to adjust without redoing structural work.
Common Mistakes in Backyard Remodel Projects
I’ve watched (and made) enough of these mistakes to know they’re nearly universal:
- Ignoring scale. A massive fire pit in a small yard or a tiny patio in a huge yard both look off.
- Forgetting maintenance reality. A garden that needs two hours of weekly care will get neglected by week three for most busy households.
- Underestimating sun exposure. Plants chosen without checking actual sun hours often die within a season.
- Skipping a focal point. Yards without one clear visual anchor — a tree, a fire feature, a striking plant grouping — tend to feel scattered.
- Rushing the budget backyard makeover before and after photos without budgeting for irrigation, which often gets cut first and regretted most.
Frequently Asked Questions
How much does a typical backyard makeover cost? Costs vary enormously based on scope. A low budget diy backyard makeover can run $500–$3,000, while a full professional backyard remodel with hardscaping, irrigation, and structures often falls between $15,000 and $75,000.
What’s the cheapest way to do a backyard makeover? Focus on edging, mulch, gravel surfaces, and secondhand furniture refreshes. These low cost cheap backyard makeover ideas deliver visible change without major material expense.
How long does a backyard renovation usually take? A weekend DIY project can refresh a small space, while full backyard renovations involving hardscaping and planting typically take four to twelve weeks depending on weather and crew availability.
Can you do a backyard makeover in a heavily wooded lot? Yes. A before and after wooded backyard project usually relies on selective clearing, shade-tolerant plants, and gravel or mulch paths rather than trying to establish grass under tree canopy.
What patio material is best for a tight budget? Gravel patios are the most affordable patio ideas for budget-conscious homeowners, though they require periodic refreshing every several years.
Should I hire a designer or do it myself? Many successful homeowner yard remodel before after projects are entirely DIY, especially for budgets under $5,000. Larger backyard renovations involving grading, drainage, or structural elements often benefit from at least a consultation with a landscape professional.