I built my first headboard out of desperation, honestly. I’d just moved into a rental with a bare mattress pushed against a wall, no headboard, no backrest, and a landlord who wasn’t thrilled about anything getting drilled into drywall. A quick trip to a furniture store told me a decent upholstered one would run me $400 to $900. So I bought a sheet of plywood, some batting, a staple gun, and about four yards of clearance-rack fabric, and spent a Saturday figuring it out.
That headboard lasted six years and two apartments.
If you’re searching for diy headboard ideas right now, you’re probably in one of two camps: you want to save money, or you can’t find a headboard that actually matches your room. Both are good reasons. This guide walks through real methods, real material lists, and the mistakes that trip people up, so you’re not guessing halfway through a project with fabric already cut.
Why Bother Making Your Own Headboard
A headboard isn’t just decoration. It anchors a bedroom visually, protects your wall from scuffs, and gives you something to lean against when you’re reading or scrolling before bed. Retailers like West Elm, Pottery Barn, and CB2 charge a premium for exactly that combination of function and looks, and a lot of that price tag is fabric markup and shipping, not complexity.
Making your own headboard gets you three things a store-bought one usually can’t:
- Custom sizing. Standard headboards are built for standard mattresses. If you’ve got a platform bed, an antique frame, or an oddly sized room, off-the-shelf options rarely fit right.
- Fabric control. You choose the exact color, pattern, and texture instead of picking from whatever’s in stock.
- Real cost savings. Most DIY builds run $60 to $200 depending on size and fabric, compared to $300 and up for anything upholstered at retail.
There’s also a straightforward confidence boost that comes from it. Once you’ve made your own headboard, smaller furniture projects stop feeling intimidating.
Planning Before You Build
Before touching a saw or a staple gun, nail down three decisions: size, style, and mounting method.
Size. Measure your mattress width, then add 2 to 4 inches on each side if you want the headboard to extend slightly beyond the bed frame. Height is more flexible, but 44 to 54 inches from the floor is a comfortable range for most rooms.
Style. This is where most of the searching happens. People landing on diy headboard ideas are usually choosing between a flat upholstered panel, a padded and tufted design, a slatted wood headboard, or one of the newer wave-shaped designs. We’ll cover each.
Mounting. Decide early whether it’ll lean against the wall, attach to the bed frame, or mount directly to studs. This affects how you build the back of the frame.
Headboard Style Comparison
| Style | Skill Level | Typical Cost | Time Needed | Best For |
|---|---|---|---|---|
| Flat upholstered panel | Beginner | $60–$150 | 2–4 hours | Renters, minimalists |
| Tufted headboard | Intermediate | $100–$250 | 4–8 hours | Traditional or glam bedrooms |
| Padded/foam headboard | Beginner | $70–$180 | 3–5 hours | Comfort-focused sleepers |
| Wavy headboard | Intermediate | $90–$220 | 5–9 hours | Modern, curved-furniture trend |
| Wood slat headboard | Beginner | $50–$120 | 2–3 hours | Scandinavian or boho rooms |
How to Make a Headboard: The Basic Build
If you want the simplest version of how to make a headboard, start with a plywood base. This is the foundation for almost every style below, including the upholstered and tufted versions.
Materials:
- ¾-inch plywood, cut to your desired size
- 1-inch foam or batting
- Fabric (upholstery-weight linen, velvet, or boucle hold up best)
- Staple gun and ¼-inch staples
- Wood glue and screws
- French cleat or L-brackets for mounting
Basic steps:
- Cut the plywood to size, or have your hardware store cut it for you.
- Sand any rough edges so fabric doesn’t snag.
- Round the corners slightly with a jigsaw for a softer look.
- Attach mounting hardware to the back before adding padding.
- Move on to padding and upholstery, covered next.
This same base is exactly what people mean when they ask how to build a headboard from scratch rather than modifying an existing frame. Once the plywood shape is cut and mounted, everything else is layering material on top.
DIY Upholstered Headboard: Step-by-Step
An diy upholstered headboard is the single most requested style, and for good reason. It’s forgiving of small mistakes, works with almost any fabric, and looks noticeably more expensive than it costs.
What you’ll need:
- Plywood base (from the section above)
- 2-inch high-density foam
- Spray adhesive
- Batting (enough to wrap the entire front and sides)
- Fabric with 4–6 inches of extra allowance on each side
- Heavy-duty staple gun
Process:
- Spray adhesive on the plywood, then press the foam onto it.
- Trim the foam flush with the plywood edges using an electric knife or bread knife.
- Layer batting over the foam, pulling it around the back and stapling every 3 inches.
- Lay your fabric face-down, center the padded board on top, and pull fabric taut before stapling.
- Work from the center of each side outward, alternating sides to keep tension even.
- Fold corners like wrapping a gift box, then staple flat.
This method answers how to make an upholstered headboard without any sewing. It’s also the base technique for most headboard upholstery projects you’ll see referenced by professional upholsterers, just scaled down for a home DIYer.
If you want variation, browsing a few diy upholstered headboard ideas boards on Pinterest before you start is genuinely useful, mainly for seeing how different fabrics photograph once stretched over foam. Velvet reads richer than linen in photos, but linen is far more forgiving to work with as a first project.
Once you’ve done one panel, doing a second for a matching bench or ottoman is a natural next step, and it’s how most people describe finishing a diy headboard upholstered to match the rest of their room.
Padded vs. Foam Headboards: What’s the Difference
People often use these terms interchangeably, but there’s a real distinction worth knowing before you buy materials.
A diy padded headboard typically uses thinner padding, often just batting without a dense foam core, giving a softer, slightly looser look. It’s quicker to build and uses less material.
A diy foam headboard relies on high-density foam (usually 1.8 lb density or higher) as the structural padding layer, giving crisper edges and better shape retention over time, especially for tufted designs where the foam needs to hold indentations.
If your goal is a headboard you’ll lean against nightly, foam is the better long-term investment; padding alone tends to flatten within a year or two.
How to make a padded headboard, specifically:
- Cut plywood to size.
- Layer 2–3 rounds of batting instead of foam.
- Staple as described in the upholstery steps above.
- Skip the foam-trimming step entirely, since batting compresses naturally around edges.
This shortcut is popular with people who want something functional fast rather than a showpiece.
DIY Fabric Headboard Ideas Beyond Upholstery
Not every diy fabric headboard needs foam or plywood at all. Fabric-only versions use tension rods, fabric-wrapped canvas stretcher bars (like an oversized art canvas), or even curtain panels hung from a rod mounted above the bed.
A few approaches worth trying:
- Stretched canvas method. Build a simple wood frame, staple fabric over it like a giant canvas, and lean it against the wall. No foam needed.
- Curtain panel headboard. Mount a curtain rod above the bed and hang two coordinating panels. Zero tools beyond a drill.
- Macrame or woven headboard. For boho rooms, a large macrame wall hanging positioned behind the bed does double duty as headboard and art.
These options are ideal for renters who can’t drill into walls for anything heavier, since most only require a single anchor point.
Tufted Headboards: The Classic Upgrade
A tufted headboard takes the upholstered method above and adds depth through button tufting, and it’s consistently one of the most searched styles because it looks custom-made even when it’s a first attempt.
What tufting adds:
- Buttons pull fabric inward at set points, creating a diamond or grid pattern
- Requires denser foam (minimum 2 inches, ideally 3)
- Needs a tufting needle and upholstery thread, not just a staple gun
Simplified diamond tufting process:
- Mark your button placement on the plywood in a diamond grid, typically 6–8 inches apart.
- Drill small holes at each mark.
- Thread upholstery buttons through the holes using a long tufting needle, pulling from the back.
- Secure each button with a staple or washer on the back side, pulling tension evenly before locking it off.
- Work in rows rather than randomly, which keeps tension consistent across the panel.
A diy tufted headboard is more time-consuming than a plain upholstered one, usually adding two to three extra hours, but it’s the style most likely to get mistaken for a custom furniture piece. If you’re comparing tutorials, look specifically for ones that address tension control, since uneven pulling is the most common flaw in a first tufted headboard diy attempt. Most tutorials skip that detail entirely, which is exactly where people get stuck.
The Wavy Headboard Trend: How to Build the Curved Look
This is the style that’s picked up serious momentum over the past couple of years, largely through interior design accounts showing curved, sculptural furniture. A wavy headboard replaces the straight top edge of a standard panel with an undulating, cloud-like silhouette.
Building a wave headboard:
- Draw your wave pattern on paper first, then transfer it to the plywood using a large curve or a flexible strip of wood as a guide.
- Cut the curve with a jigsaw, moving slowly through tight curves to avoid splintering.
- Sand the curved edges heavily, since fabric will show every rough spot along a curve.
- Use extra batting layers along the curve to smooth out any transition points before upholstering.
- Staple fabric in small, overlapping folds along the curved sections rather than one continuous pull, which prevents puckering.
The curved cutting step is really the only part that differs from a standard upholstered build, everything else follows the same padding and stapling process covered earlier.
Some people extend this look further into a full wavy bed frame, where the curve continues down the sides of the bed rather than stopping at the headboard. That’s a bigger undertaking involving a full frame rebuild, so it’s worth starting with just the headboard before committing to the whole frame.
DIY Upholstered Bed Frame: Going Bigger
Once the headboard clicks, some people go further and tackle a full diy upholstered bed frame, wrapping the footboard and side rails in matching fabric too. It uses the same core technique, plywood panels padded with foam and wrapped in fabric, just applied to more surfaces.
A few things change at that scale:
- Structural integrity matters more, since the frame bears actual weight, not just leaning weight
- Plan for significantly more fabric yardage, often 3–4 times what a headboard alone needs
- Consider removable, zippered fabric covers over rails so you can wash or replace fabric later without rebuilding the frame
This is a solid second project once you’ve built one or two headboards, but it’s not the best starting point for a first DIY attempt.
More DIY Headboard Ideas Worth Trying
If none of the above fit your space or skill level, there are plenty of other diy headboard ideas that don’t require upholstery at all:
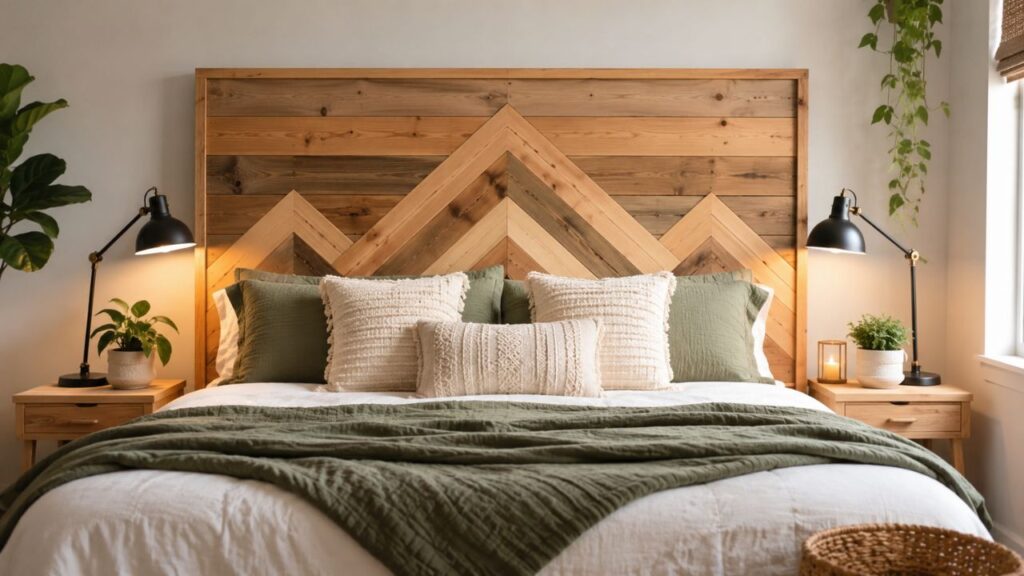
- Reclaimed wood slats mounted horizontally or vertically for a rustic look
- Old door or shutter repurposed and mounted flat against the wall
- Pegboard headboard for a functional option with built-in storage hooks
- Painted plywood with a stenciled pattern, no fabric required
- Rattan or cane webbing stretched over a simple frame for a lighter, airy feel
The common thread across most diy headboards worth building is that they solve a real problem, whether that’s cost, fit, or matching a specific aesthetic, rather than just filling space behind the bed.
If you’re still deciding, it helps to physically stand where the bed will go and picture the shape against the wall before committing to material. A tufted or wavy headboard reads very differently in a small room than a large one.
Tools and Materials Checklist
| Item | Needed For | Approximate Cost |
|---|---|---|
| ¾-inch plywood | All styles | $25–$45 |
| High-density foam | Upholstered, tufted, wavy | $20–$50 |
| Batting | All upholstered styles | $10–$20 |
| Upholstery fabric (4–5 yards) | Upholstered, tufted, fabric styles | $40–$120 |
| Staple gun + staples | All upholstered styles | $25–$40 (one-time tool cost) |
| Tufting buttons + needle | Tufted style only | $10–$15 |
| Jigsaw | Wavy, curved cuts | $40–$80 (one-time tool cost) |
| Mounting hardware | All styles | $10–$20 |
Common Mistakes to Avoid
- Cutting fabric too tight. Always leave more allowance than you think you need. You can trim excess, but you can’t add fabric back.
- Skipping foam density checks. Low-density foam flattens within months under regular contact.
- Ignoring wall mounting weight limits. A fully padded, tufted panel can weigh 25–40 pounds; make sure your mounting hardware is rated for it.
- Ironing fabric after stapling. Iron and steam wrinkles out before you staple, not after; heat near staples can warp thin plywood.
- Rushing corner folds. Sloppy corners are the first thing people notice on an otherwise well-built headboard.
Frequently Asked Questions
How much does a DIY headboard actually cost? Most builds land between $60 and $220 depending on size, fabric choice, and whether you’re adding tufting. Fabric is usually the biggest cost variable.
What’s the easiest headboard style for a first-time DIYer? A flat, plain upholstered panel is the most forgiving. No curves, no tufting, minimal fabric waste.
Can I make a headboard without a sewing machine? Yes. Every method above uses a staple gun rather than sewing. Sewing only becomes necessary for slipcover-style, removable fabric options.
Do I need power tools? A jigsaw helps for curved or wavy designs, but a straight-edged headboard can be built with just a staple gun, screwdriver, and a hand saw if needed.
How do I attach a headboard without drilling into the wall? Attach it directly to your bed frame using L-brackets, or lean it against the wall and secure it to the bed frame from behind for stability.
How long does foam typically last in a DIY headboard? High-density foam holds its shape for 5–8 years with regular use. Thinner or low-density foam may flatten in 1–2 years.
Choosing Fabric That Actually Holds Up
Fabric choice makes or breaks a headboard project more than any other decision, and it’s the part most tutorials rush through. A few practical notes from actually living with different fabrics over the years:
Linen is the most forgiving for beginners. It has enough give to stretch smoothly over foam, it hides small stapling errors, and it doesn’t show sun fading as dramatically as darker synthetic blends. The tradeoff is that it stains more easily, so it’s not the best pick if you eat breakfast in bed regularly.
Velvet photographs beautifully and adds real texture, but it’s harder to work with. It shows every staple line and seam if you pull unevenly, and it can shift or “crush” in odd patterns if the foam underneath isn’t perfectly smooth. If you’re set on velvet, spend extra time on the foam layer before you ever touch the fabric.
Performance fabrics, the stain-resistant, tightly woven blends often marketed for pet owners or kids’ rooms, are the most durable option for a headboard that gets daily contact. They’re stiffer to work with initially but relax slightly once stretched.
Boucle, which has become one of the more requested textures over the past couple of seasons, sits somewhere in the middle. It’s forgiving to staple but can shed loose fibers for the first few weeks after upholstering, so vacuum it lightly before final placement.
Whatever you choose, buy slightly more than the pattern calls for. Fabric with a directional print or a visible weave pattern needs extra allowance to line up correctly across the panel, especially on a tufted or wavy shape where the surface isn’t flat.
Matching Your Headboard to Your Room’s Existing Style
A headboard sits at eye level in a room people spend a third of their life in, so it’s worth thinking through how it fits the rest of the space rather than picking a style in isolation.
In a smaller bedroom, a tall, heavily padded panel can make the room feel more cramped, even if the headboard itself looks great in photos. A lower profile, flatter upholstered panel or a simple wood slat design tends to keep sightlines open and the room feeling larger than it is.
In a room with a lot of existing pattern, busy bedding, patterned rugs, or bold wallpaper, a solid-colored fabric on the headboard gives the eye somewhere to rest. Reserve pattern on the headboard itself for rooms that are otherwise fairly neutral.
Color temperature matters more than people expect. Warm-toned fabrics (rust, cream, warm gray) tend to read as cozier under yellow-toned bedroom lighting, while cooler tones (sage, dusty blue, true gray) hold up better under daylight-balanced bulbs or rooms with large windows. If you’re not sure, bring a fabric swatch home and look at it under your actual bedroom lighting at night before buying yardage.
When to Hire a Professional Instead
Not every project should be DIY, and it’s worth being honest about that. If you’re working with an expensive fabric you can’t afford to waste, if your design involves compound curves beyond a simple wave, or if you’re short on time and the project would otherwise sit half-finished for months, a local upholsterer can often build a custom headboard for a few hundred dollars more than materials alone would cost.
That said, most of the projects covered in this guide, plain upholstered panels, basic tufting, and even the wave-shaped cut, are well within reach for someone building furniture for the first time. The main variable isn’t skill so much as patience during the stapling and fabric-pulling stage, which is genuinely the slowest part of any build.
Maintaining Your Headboard Long-Term
Once it’s built and mounted, a little upkeep keeps it looking sharp for years rather than months.
- Vacuum the fabric surface every few weeks using a soft brush attachment to prevent dust buildup in the weave.
- Spot-clean stains immediately with a fabric-appropriate cleaner rather than letting them set.
- Rotate or fluff the padding annually if it’s a padded rather than foam-core design, since batting compresses unevenly with regular contact.
- Keep it out of direct sunlight where possible, since UV exposure fades most fabrics within a couple of years regardless of quality.
- Check mounting hardware twice a year, especially if the headboard leans against the wall rather than bolting to a frame, since normal movement can loosen screws over time.
Final Thoughts
A headboard is one of the more approachable furniture builds you can take on, mostly because mistakes are forgiving. Fabric can be re-stapled, foam can be re-cut, and a slightly imperfect tuft pattern still reads as handmade rather than sloppy once it’s on the wall. Start with the plain upholstered version if you’re unsure, then work up to tufting or a wave-shaped cut once you’re comfortable with the basic build.