If you’ve ever picked up an old brass candlestick at an estate sale, or noticed your front door hardware has gone the color of a dirty penny, you already know the problem. Brass doesn’t stay golden on its own. It tarnishes, it spots, it goes a weird greenish-brown in patches, and most people just give up and let it happen.
You don’t have to. I’ve spent a stupid amount of time over the years restoring old hardware, lamps, and decor pieces, and the truth is that cleaning brass is one of the most forgiving home projects you can take on. You don’t need fancy equipment. You don’t even need a commercial cleaner if you don’t want one. What you need is the right method for the type of brass you’re dealing with, and a little patience.
This guide walks through every realistic method for cleaning brass, from the lemon-and-salt trick your grandmother probably used, to a proper step-by-step on using brasso polish correctly, to how professionals get that mirror finish on antique fixtures. By the end, you’ll know exactly how to clean brass hardware, brass decor, and even badly neglected antique pieces, without ruining the finish.
What Makes Brass Tarnish in the First Place?
Brass is an alloy, mostly copper mixed with zinc. That copper content is exactly why brass tarnishes the way it does. When copper reacts with oxygen and moisture in the air, it forms a layer of oxidation on the surface. That’s the dull, brownish, sometimes greenish film you see building up on doorknobs, lamps, and decorative pieces.
Humidity speeds this up. So does skin oil from handling something like a doorknob multiple times a day. Salt air near the coast is another big one — if you live somewhere humid or coastal, expect brass to tarnish faster than it would in a dry inland climate.
The green-ish crust some people see, often called verdigris, is a more advanced form of copper oxidation. It looks alarming but it’s not usually permanent damage. With the right cleaning brass method, most of it comes right off.
Solid Brass vs. Lacquered Brass: Check This Before You Clean Anything
This step gets skipped constantly, and it’s the single biggest reason people end up disappointed with their results. Not all brass is finished the same way, and the method that works beautifully on one type can strip or streak another.
Solid, unlacquered brass is bare metal. It tarnishes naturally and can be polished directly. This is what you’ll usually find on older hardware, antique items, and a lot of decorative pieces.
Lacquered brass has a clear protective coating sprayed or baked onto the surface. This is common on newer hardware, faucets, and mass-produced fixtures. If you scrub lacquered brass with an abrasive polish, you can damage or strip the coating unevenly, which leaves blotchy patches that look worse than the tarnish did.
Quick Way to Test Which Type You Have
- Touch a small, hidden spot with a drop of rubbing alcohol on a cotton swab.
- If a black or dark smudge transfers onto the cotton swab, the brass is unlacquered — it’s reacting directly with the alcohol.
- If nothing transfers, there’s likely a lacquer coating protecting the surface.
If your piece is lacquered and the lacquer is intact, all you usually need is mild soap and water — skip the polish entirely. If the lacquer is already peeling or flaking, you’ll need to remove the rest of it (acetone works) before any cleaning brass method will look even.
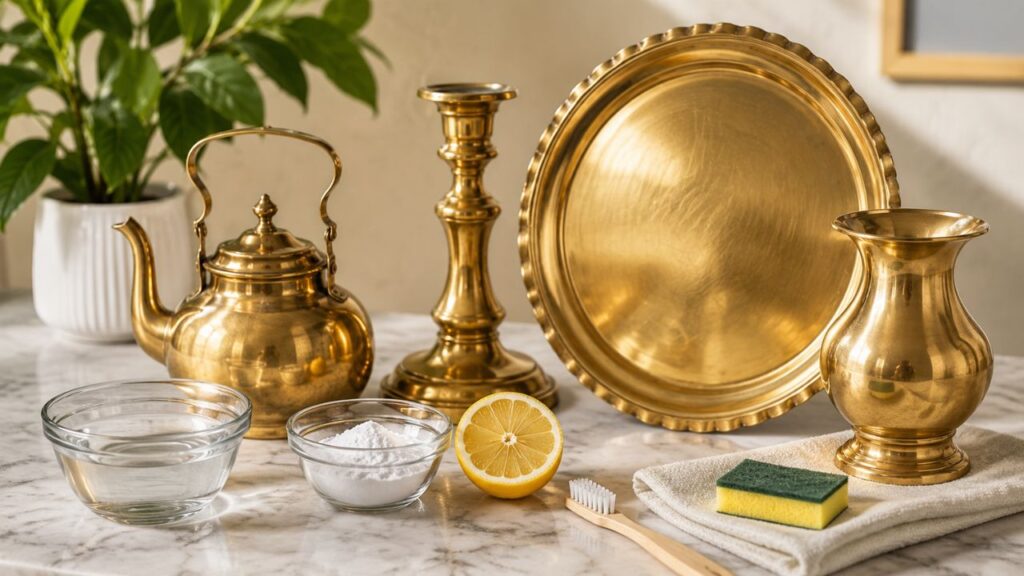
Tools and Supplies for Cleaning Brass
Before you start, gather what you’ll actually need. Most of these are already in your kitchen.
- Soft microfiber cloths (at least two — one for cleaning, one for buffing)
- A soft-bristled toothbrush or small brush for grooves and detailing
- Dish soap and warm water
- White vinegar
- Fresh lemons or lemon juice
- Table salt and baking soda
- Plain flour (for making a paste)
- Rubber gloves
- A commercial option like Brasso polish, Bar Keepers Friend, or Wright’s Brass Polish if you want a faster result
- Carnauba wax or a museum wax for sealing afterward (optional but recommended)
You really don’t need every item on this list. Pick the lane that fits your situation — natural ingredients or a store-bought polish — and stick with it.
How to Clean Brass at Home With Natural Ingredients
If you’d rather avoid harsh chemicals, or you simply don’t have a commercial polish on hand, these methods for cleaning brass at home work surprisingly well on unlacquered pieces. They’re also the answer if you’ve been searching for how to clean brass without brasso specifically.
The Lemon and Salt Method
This is the classic, and for good reason — it’s fast, cheap, and genuinely effective on light to moderate tarnish.
- Cut a lemon in half and sprinkle salt directly onto the cut surface.
- Rub the salted lemon over the tarnished brass in small circles.
- Reapply salt as needed; you’ll see the tarnish start lifting onto the lemon almost immediately.
- Rinse with warm water and dry thoroughly with a clean cloth.
The citric acid in the lemon dissolves the oxidation, and the salt adds just enough grit to help lift it off the surface. This is one of the best ways to clean brass without buying anything special.
Vinegar, Flour, and Salt Paste
For heavier tarnish, lemon alone might not cut it. This paste has more staying power because it clings to the surface instead of running off.
- Mix equal parts white vinegar and salt, then stir in enough flour to form a thick paste.
- Apply a generous layer over the tarnished area.
- Let it sit for about an hour — longer for stubborn spots.
- Rinse off completely with warm water and buff dry.
This is genuinely one of the best ways to clean brass that’s been neglected for years, like an inherited piece that’s sat in a basement or attic.
The Ketchup Method (Yes, Really)
Ketchup contains vinegar and tomato acid, both mild enough to clean brass gently without scratching it.
- Squeeze a small amount of ketchup directly onto the brass.
- Rub it in with a soft cloth or your fingers (wear gloves if you’re squeamish).
- Let it sit for 10–15 minutes on heavier tarnish.
- Rinse thoroughly — ketchup left on the surface will dry sticky — and dry completely.
It sounds like a joke until you try it. It’s a solid backup option if you’re out of lemons and don’t feel like making a paste.
How to Clean Brass Without Brasso: Other Household Swaps
Brasso isn’t the only commercial option, and plenty of people specifically want to know how to clean brass without brasso because of the smell, the fumes, or just personal preference. A few solid alternatives:
- Bar Keepers Friend — a mild abrasive cleaner that works well on solid brass with stubborn grime, particularly on hardware that gets handled often.
- Toothpaste — plain white, non-gel toothpaste has mild abrasives that work on light tarnish in a pinch.
- Baking soda paste — mix with a small amount of water, apply, let sit five minutes, then buff off.
- Worcestershire sauce — sounds strange, but the acidity does the same job as the ketchup method.
None of these will outperform a dedicated brass cleaner on deep, years-old tarnish, but for routine maintenance they do the job without the fumes.
Using Brasso Polish the Right Way
If you want speed and consistency, brasso polish is still one of the most widely used products for this exact job, and it’s worth doing properly rather than just slapping it on and wiping.
Step-by-step:
- Wash the piece first with warm soapy water to remove surface dust and grime. Polishing over dirt just grinds it into the metal.
- Dry completely before applying anything.
- Shake the bottle and apply a small amount of brass polish to a soft cloth — not directly onto the brass.
- Rub in small, circular motions, applying light, even pressure.
- Let the polish dull and haze slightly (this means it’s working), then buff off with a clean, dry section of the cloth.
- Repeat on heavily tarnished spots, then do one final buff with a fresh cloth for shine.
A lot of people make the mistake of pouring polish straight onto the brass surface. It pools, dries unevenly, and leaves streaks that take extra effort to fix. Cloth first, every time.
How to Polish Brass to a Mirror Finish
Getting to a genuine mirror finish is a different goal than simply cleaning brass. Removing tarnish gets you to “clean.” Getting to “mirror” takes an extra round of fine polishing.
Here’s the realistic process for how to polish brass to a mirror finish:
- Start with a fully clean, tarnish-free surface using any method above.
- Apply a fine metal polish (Wright’s Brass Polish and Weiman’s brass polish both work well for this stage) using a very soft cloth.
- Use light pressure and small, consistent circular strokes — pressing hard doesn’t speed things up, it just risks micro-scratches.
- Switch to a clean, dry microfiber cloth and buff in straight, long strokes rather than circles for the final pass. This is what actually brings out the reflective shine.
- Hold the piece up to a light source and check for haze or missed spots from an angle, since flat lighting hides imperfections.
- Do a second light pass if needed, focusing only on dull patches.
This is also where patience matters most. Rushing the final buff is the most common reason people end up with a “clean but flat” finish instead of an actual mirror shine.
How to Buff Brass for a Professional-Looking Shine
Buffing is the step people skip, and it’s the difference between brass that looks “fine” and brass that looks genuinely restored.
- Use a dedicated buffing cloth or a clean microfiber cloth — never paper towels, which can leave fine scratches over time.
- Buff in one consistent direction rather than scrubbing back and forth randomly.
- For detailed or grooved pieces, an old soft toothbrush works for buffing tight corners where cloth can’t reach.
- If you’re working on a larger piece — like a fireplace surround or a large decorative panel — a low-speed buffing attachment on a drill, fitted with a soft cotton wheel and a small amount of polish, speeds things up considerably. Keep the speed low; brass is soft and heats up faster than you’d expect.
Knowing how to buff brass properly is honestly more important than which polish you choose. A mediocre polish with a great buffing technique will outperform a premium polish buffed carelessly.
How to Clean Brass Hardware Around the House
Hardware gets handled constantly, which means body oils, dust, and grime build up fast — often faster than straightforward tarnish.
Door knobs and hinges: Remove if possible (much easier than working around a door). Wash with warm soapy water, dry, then polish with your chosen method.
Cabinet pulls and knobs: These often have intricate detailing, so a soft toothbrush dipped in a vinegar-salt mix gets into grooves that a cloth misses.
Light fixtures: Always unplug or shut off power first. Wipe with a barely damp cloth rather than soaking, since moisture near wiring is a real risk.
Faucets and bathroom fixtures: Many modern brass faucets are lacquered or have a protective finish (often labeled “PVD” or similar). Check your manufacturer’s care instructions before polishing — an abrasive cleaner can void the finish warranty on these.
If you’re cleaning brass hardware that’s still attached and can’t be removed, work in smaller sections and keep your cloth from dripping polish onto surrounding wood or paint.
Comparison Table: Best Brass Cleaning Methods
| Method | Best For | Speed | Cost | Mirror Finish Result |
|---|---|---|---|---|
| Lemon & Salt | Light tarnish, quick touch-ups | Fast | Very Low | Good |
| Vinegar/Flour/Salt Paste | Heavy, neglected tarnish | Slow (needs sit time) | Very Low | Very Good |
| Ketchup | Light to moderate tarnish | Fast | Very Low | Good |
| Brasso Polish | General all-purpose cleaning brass | Fast | Low | Very Good |
| Bar Keepers Friend | Grimy hardware, daily-use items | Fast | Low | Good |
| Wright’s / Weiman Polish | Fine finishing, mirror shine | Moderate | Moderate | Excellent |
| Drill + Buffing Wheel | Large pieces, restoration projects | Fast | Moderate (equipment) | Excellent |
Common Mistakes People Make When Polishing Brass
- Skipping the lacquer test. Polishing lacquered brass with abrasives causes blotchy, uneven stripping.
- Using steel wool or rough scrubbers. Brass is soft. Anything abrasive beyond a soft cloth or toothbrush risks permanent scratching.
- Not drying thoroughly before polishing. Trapped moisture under a fresh polish layer can cause spotting later.
- Pouring polish directly onto the metal. Always apply to the cloth first.
- Stopping after the first wipe-down. The buffing pass is what actually creates shine — the polishing step alone usually just removes tarnish.
- Ignoring grooves and detailing. Tarnish hides in corners and engraved areas; a toothbrush handles what cloth can’t reach.
How Often Should You Polish Brass?
For hardware that gets touched daily — door handles, cabinet pulls — a light clean every couple of months keeps tarnish from building up to the point where you need a heavy-duty session. Decorative, rarely-touched pieces can usually go six months to a year between polishes, depending on your home’s humidity.
Coastal or humid climates will need more frequent attention. If you’re noticing tarnish returning within weeks of polishing, that’s usually a sign of high ambient humidity rather than anything you’re doing wrong.
Protecting Brass After You Polish It
Polishing brass to a shine and then doing nothing else means you’ll be back here again in a month. A light protective coat extends that window considerably.
- Carnauba or museum wax: Apply a thin layer with a soft cloth after polishing, let it haze, then buff off. This slows tarnish buildup noticeably.
- Clear lacquer spray: A more permanent option for decorative pieces that won’t be handled often, though it changes the look slightly and isn’t ideal for hardware that gets gripped daily.
- Keep it dry: Simply wiping down brass after it’s been wet (like bathroom fixtures) reduces how often you’ll need a full cleaning brass session.
Frequently Asked Questions
How do you clean brass that’s heavily tarnished or green? Start with the vinegar, flour, and salt paste, letting it sit a full hour on the worst spots. Heavy oxidation usually needs that extended contact time rather than a quick wipe.
What is the best way to polish brass without scratching it? Always use soft, non-abrasive cloths and apply light, circular pressure. Avoid steel wool, scouring pads, or anything textured — brass scratches more easily than people expect.
Can you use Brasso polish on antique brass? Generally yes, on solid, unlacquered antique brass. But test a small hidden area first, since some antiques have a deliberately aged patina that owners want preserved rather than polished away.
How to clean brass without Brasso, fast? Lemon and salt is the quickest no-purchase option. Cut, sprinkle, rub, rinse — most light tarnish lifts within a few minutes.
Is it bad to clean brass too often? Frequent gentle cleaning is fine. What causes damage is frequent abrasive polishing, which can slowly wear down plating on items that aren’t solid brass all the way through.
How do I know if my brass is real or plated? Use a magnet. Solid brass isn’t magnetic, so if a magnet sticks, you’re dealing with a plated base metal underneath rather than solid brass.
What’s the fastest way to clean brass hardware on doors without removing it? Work in small sections with a damp cloth and mild polish, keeping pressure light and avoiding drips onto surrounding wood or paint.