There’s a particular kind of satisfaction that comes from pulling the last staple out of a tired old dining chair and watching decades of stains and sagging foam come away in your hands. That’s usually the moment people get hooked on reupholstery.
If you’ve landed here, you’re probably staring at a chair that’s structurally fine but visually exhausted — maybe a set of dining chairs your grandmother left you, or a thrifted armchair with good bones and a bad outfit. The good news is that you don’t need a workshop full of tools or a degree in upholstery to fix that. You need patience, a staple gun, and a plan.
This guide walks through exactly how to reupholster a chair, with a particular focus on how to reupholster dining room chairs, since dining seats are the most common entry point into this hobby. We’ll cover tools, fabric math, padding choices, the actual stapling technique, and the mistakes that trip up almost every beginner.
What Reupholstery Actually Means (and What It Doesn’t)
Reupholstery is the process of removing old fabric, padding, and sometimes webbing from a piece of furniture, then rebuilding it with new materials. It’s different from “recovering,” which usually just means stapling new fabric over the old layer without touching the padding underneath.
True reupholstery touches:
- The outer fabric
- The foam or padding layer
- The batting (the soft fluffy layer that smooths out foam edges)
- Sometimes the webbing or springs underneath
Recovering only touches the fabric. For a dining chair seat that’s just faded or stained, recovering might be enough. For one where the foam has gone flat or crumbly, you’ll want full reupholstery.
Knowing which one you need before you start saves you a trip back to the fabric store.
Tools and Materials You’ll Actually Use
You don’t need everything on a professional upholsterer’s bench, but a few specific tools make the job dramatically easier.
Essential tools:
- Flathead screwdriver or staple remover
- Pliers (needle-nose work well for stubborn staples)
- Electric staple gun (manual ones work but tire your hand fast)
- Fabric scissors
- Tape measure
- Marker or chalk for fabric
Materials:
- Upholstery-weight fabric (cotton duck, linen blends, or performance fabrics like Sunbrella or Crypton hold up best on dining chairs)
- High-density foam, 1.5–2 inches thick for most seat pads
- Polyester batting
- Staples (5/16″ or 3/8″ length for most wood frames)
- Optional: piping cord, decorative nailhead trim, or a hot glue gun for finishing touches
If you’re working on a chair with springs or webbing damage, you’ll also want jute webbing and a webbing stretcher, but most home dining chairs only have a plywood seat base, which keeps the project simple.
How to Reupholster a Dining Chair: Step-by-Step
This section covers the most searched scenario: reupholstering a single dining chair seat. The same logic scales up if you’re reupholstering dining room chairs as a full set.
Step 1: Remove the Seat and Strip the Old Fabric
Flip the chair over. Most dining chair seats are attached with four screws into corner blocks. Remove those, lift the seat pad free, and set the screws aside in a small dish so you don’t lose them.
Using your staple remover or flathead screwdriver, pry up each staple along the underside edge. Pull the old fabric off, then the batting, then the foam. Take a photo before you start tearing things apart — it helps later when you’re wrapping the new layers in the same order.
Step 2: Assess the Foam and Base
Check the plywood base for cracks or soft spots. If it’s solid, you can reuse it. If the foam has yellowed, lost its bounce, or crumbles when pressed, replace it rather than trying to “fluff” it back to life with extra batting.
Step 3: Cut New Foam and Batting
Trace the seat base onto your foam using a marker, then cut slightly outside the line — about a quarter inch — so the foam compresses snugly against the edges rather than sitting loose inside the frame.
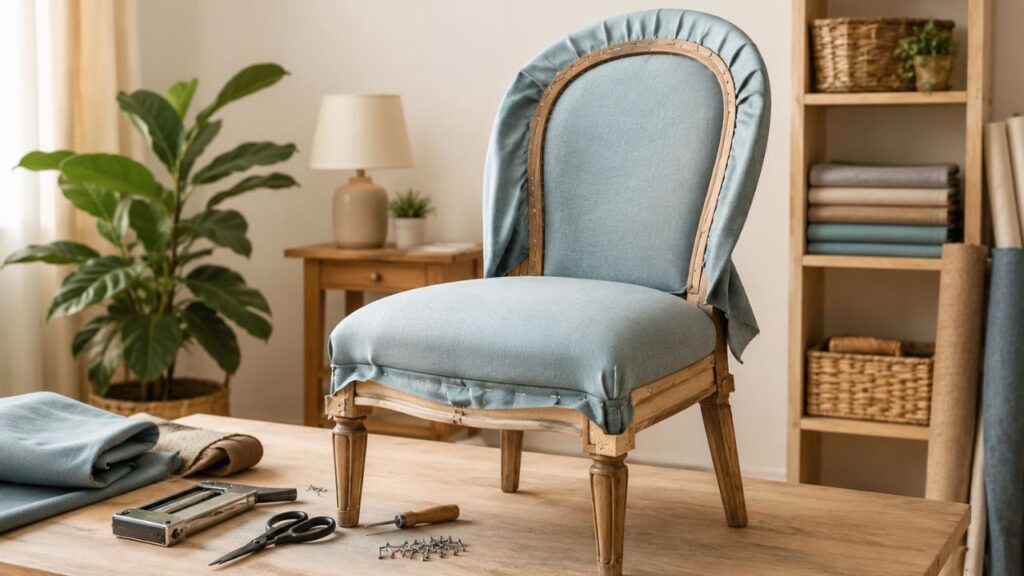
Layer batting over the foam, wrapping it down around the sides. This step is what gives a reupholstered chair that smooth, rounded look instead of a boxy, hard-edged one.
Step 4: Cut and Position the Fabric
Lay your fabric face down, center the seat base foam-side down on top, and measure enough excess on all sides to wrap and staple — usually 3 to 4 inches per side is comfortable to work with.
Step 5: Staple the Fabric
This is the step most beginners rush, and it’s the one that determines whether the finished chair looks professional or homemade.
- Start by stapling the center of one side, pulling the fabric taut.
- Move to the opposite side and repeat, pulling with equal tension.
- Do the same on the remaining two sides.
- Work outward from each center staple toward the corners, alternating sides so tension stays even.
- Save the corners for last — fold them like wrapping a gift box, tucking excess fabric under itself for a clean, flat finish.
Step 6: Trim and Reattach
Trim excess fabric close to the staples with sharp scissors, then screw the finished seat back onto the chair frame.
That’s genuinely the whole process. Once you’ve done one seat, doing the next five goes twice as fast.
Reupholstering Dining Room Chairs as a Full Set
When the project shifts from a single seat to reupholstering dining room chairs as a complete set, a bit of planning prevents headaches.
Buy fabric in one cut, not several trips. Dye lots vary between bolts, and you don’t want chair four looking slightly different from chair one under afternoon light.
Calculate yardage before you shop. A standard dining chair seat needs roughly half a yard of fabric including wrap allowance. For six chairs, budget around 3 to 3.5 yards, plus extra if your fabric has a directional pattern like stripes or florals that need to line up across the set.
Work assembly-line style. Strip all six chairs first, cut all six foam pieces next, then move to fabric. Batching each stage is faster and more consistent than finishing one chair completely before starting the next.
Match pattern direction. If you’re using a patterned fabric, decide upfront whether the pattern should run the same direction on every chair or be centered individually. Inconsistent placement is one of the first things guests notice at a dinner table.
Comparison: DIY Reupholstery vs. Professional Reupholstery vs. Slipcovers
| Factor | DIY Reupholster | Professional Upholsterer | Slipcover |
|---|---|---|---|
| Average cost (per dining chair) | $15–$40 in materials | $80–$200 per chair | $20–$60 per chair |
| Time investment | 1–2 hours per chair (after first one) | None — drop off and collect | 10 minutes to fit |
| Skill required | Beginner to moderate | None (you’re paying for theirs) | None |
| Durability | High, if done correctly | Highest, professional-grade materials | Moderate, fabric wears faster |
| Customization | Full control over fabric/padding | Full control, guided by expert | Limited to available covers |
| Best for | Hobbyists, budget renovations | Antiques, valuable or complex pieces | Renters, quick seasonal refreshes |
If your chairs are simple wood-framed dining seats, reupholstering furniture yourself is almost always the better value. Save the professionals for carved antiques, tufted backs, or anything with springs and coils you’re not confident disassembling.
Common Mistakes (and How to Avoid Them)
Stapling too far apart. Staples should sit roughly half an inch apart. Wider spacing leaves loose pockets that sag within months.
Pulling fabric unevenly. If one side gets pulled tighter than its opposite, the pattern will visibly skew. Always staple opposite sides before moving to adjacent ones.
Skipping the batting layer. Fabric stapled directly over foam without batting looks thin and shows every staple line and seam through the surface.
Using fabric that’s too lightweight. Quilting cotton and apparel fabric don’t hold up to daily sitting. Stick to upholstery-grade weights rated for furniture use.
Forgetting to check screw holes. Reattaching a seat with the wrong screws, or stripped holes from age, leads to a wobbly finished chair. A dab of wood glue in worn screw holes before reinserting solves this in seconds.
A Quick Real-World Scenario
A reader recently reached out after finishing a set of six mid-century dining chairs with a bouclé fabric. The first chair took her almost three hours, mostly from over-thinking the corners. By chair six, she’d cut that down to about 35 minutes, simply from repeating the same staple sequence each time. That’s typical. The learning curve in reupholstery is steep at first and flattens out fast — which is exactly why dining sets are such a popular practice project for people new to the craft.
Frequently Asked Questions
How much fabric do I need to reupholster a dining chair? Roughly half a yard per seat, including enough extra to wrap and staple underneath. For a full set of six, budget 3 to 3.5 yards.
Can I reupholster a chair without removing the old fabric? You can staple new fabric directly over old fabric if the existing layer is flat and in decent shape, but it adds bulk and can look lumpy. For dining chairs, fully stripping the old layer gives a cleaner result.
What’s the best fabric for reupholstering dining chairs? Performance fabrics like Sunbrella or Crypton resist stains and spills, which matters a lot at a dining table. Cotton duck and linen blends are good budget alternatives if the chairs see lighter use.
Do I need a sewing machine to reupholster a chair? No. Most dining chair seats are stapled, not sewn. A sewing machine becomes useful only if you’re adding piping, welting, or a fitted slipcover-style cover.
How long does it take to reupholster a chair? A single dining chair seat takes about 1 to 2 hours for a beginner, dropping to 30–45 minutes once you’ve practiced the staple sequence on a few chairs.
Is reupholstering furniture cheaper than buying new? Almost always, especially for solid wood frames. Reupholstering furniture costs a fraction of replacing it and lets you keep pieces with sentimental or structural value that aren’t being made the same way anymore.