I’ve hung more curtain rods than I can count — for my own place, for two rental apartments I fixed up, and for a handful of friends who called me in a mild panic after their rod fell off the wall an hour after they put it up. That last part happens more than people admit. A curtain rod that isn’t installed correctly will eventually let go, usually while someone is tugging the curtain closed at night.
This guide walks through the whole process: picking the right hardware, measuring properly, and mounting the rod on whatever kind of wall you’re dealing with. I’ll also touch on how your rod choice connects to the kind of curtains you’re hanging, because a heavy pair of drapes needs different support than a light cotton panel.
Why Curtain Rod Installation Trips People Up
Most people assume hanging a curtain rod is a five-minute job — drill two holes, screw in the brackets, done. Sometimes that’s true. But the reason so many rods end up crooked, sagging, or ripped out of the wall comes down to three recurring mistakes:
- Mounting brackets too close to the window frame, which blocks light and makes curtains look pinched
- Skipping wall anchors on drywall, especially with heavier fabric
- Measuring height and width without accounting for how the curtains will actually hang once they’re on the rod
None of these are complicated to fix. They just require slowing down for the ten minutes it takes to measure and mark properly before you touch a drill.
Tools You’ll Need
Before you start, gather everything so you’re not running to the hardware store mid-project:
| Tool | Purpose |
|---|---|
| Tape measure | Measuring width, height, and bracket spacing |
| Pencil | Marking bracket positions |
| Level | Keeping the rod straight |
| Drill with drill bit and screwdriver bit | Making pilot holes and driving screws |
| Stud finder | Locating studs behind drywall |
| Wall anchors | Supporting weight on drywall without studs |
| Curtain rod and brackets | The hardware itself |
| Step stool or ladder | Reaching window height safely |
If you’re mounting into brick, plaster, or tile, you’ll also want a masonry drill bit and anchors rated for that surface.
Step 1: Decide Where the Rod Should Go
This is the step people rush through, and it’s the one that determines whether your finished window looks intentional or slightly off.
Height: For most rooms, mount the rod 4 to 6 inches above the window frame. If you want to make ceilings feel taller — a common trick when hanging curtains for living room windows — go higher, sometimes as close to the ceiling as your wall allows. The extra height draws the eye upward and makes the whole wall look bigger than it is.
Width: Extend the rod 4 to 8 inches beyond each side of the window frame. This lets you pull curtains fully open during the day so they don’t block any window light, which matters if you’re mounting bedroom curtains in a room that depends on morning sun.
A rule of thumb I give people: measure twice, mark once, and stand back to look at the marks from across the room before drilling. A pencil mark that looks fine up close can look uneven from ten feet away.
Step 2: Identify Your Wall Type
Your wall material changes everything about how you’ll secure the brackets.
Drywall
Most interior walls in North American homes are drywall over wood studs. Use your stud finder to locate a stud near your bracket marks. If a stud lines up, you can screw directly into it — no anchor needed, and it’s the strongest option for heavier hardware.
If no stud is available where you need the bracket, use a wall anchor rated for the weight of your rod and curtains combined. Toggle bolts hold more weight than plastic screw-in anchors, so for anything holding custom made curtains in a heavier linen or velvet, toggle bolts are worth the extra few minutes.
Plaster
Older homes often have plaster walls, which crack easily if you drill without a pilot hole. Use a small masonry or plaster bit to start the hole, then switch to anchors designed for plaster’s density.
Brick or Concrete
You’ll need a hammer drill or a standard drill with a masonry bit, along with concrete anchors. Pilot holes should be slightly smaller than the anchor diameter so the anchor grips tightly.
Tile
Tile is the trickiest surface. Use painter’s tape over your mark to keep the bit from skating, start slow with a masonry bit, and switch to a regular bit once you’re through the glaze and into the wall material behind it.
Step 3: Mark and Level Your Bracket Positions
Hold one bracket at your marked height and use a level to make sure it’s straight. Mark the screw holes with a pencil. Measure across to the other side for the second bracket — don’t just eyeball the distance, measure from a fixed point like the window frame edge on both sides to keep things symmetrical.
For rods over 60 inches wide, especially with heavier fabric, add a center support bracket to stop the rod from bowing in the middle. This matters more than people expect once you’ve hung a full-length linen panel and watched a two-bracket rod sag within a week.
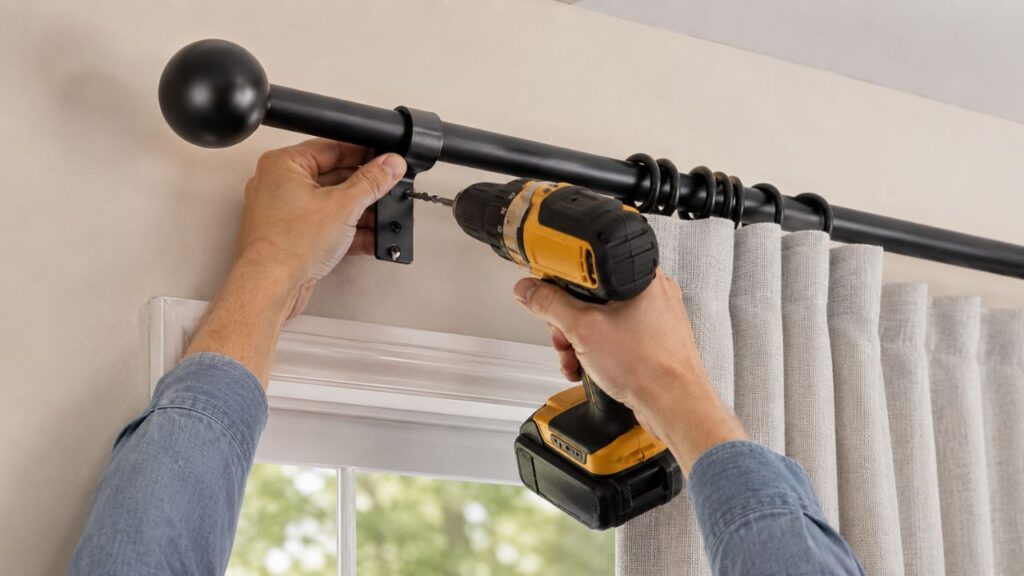
Step 4: Drill and Mount the Brackets
- Drill pilot holes at your marked points.
- Insert wall anchors if you’re not hitting a stud.
- Screw the brackets into place, checking with your level as you go.
- Double-check both brackets are at the same height by measuring from the floor or ceiling, not just eyeballing it.
Step 5: Add Curtain Rings or Slide the Rod Through the Panels
If your curtains use rings, clip or thread them onto the rod before setting it into the brackets — it’s much easier than trying to add rings once the rod is already mounted six feet up. If your panels have a rod pocket, slide the rod directly through the fabric, then rest it into the brackets and tighten any finial screws to lock it in place.
Step 6: Hang the Rod and Test It
Set the rod into the brackets, tighten any locking screws, and give it a firm tug to test the hold. If it wobbles or shifts, that’s a sign the anchor isn’t seated properly — better to catch that now than after the curtains have been up for a month.
Matching Your Rod to Your Curtain Style
The rod is only half the equation. What you hang on it matters just as much, and this is where a lot of people get stuck choosing between ready-made panels and something made to fit.
If you’re working with an unusual window size, or a bay window with an odd angle, standard panels rarely fit right. That’s where custom size curtains come in — they’re built to your exact measurements instead of the standard 84 or 96-inch lengths sold at most retailers. I’ve measured windows that were three inches off from anything on the shelf, and no amount of hemming makes an off-the-rack panel look as clean as one built to spec.
Customized curtains also solve a problem beyond just length — fabric weight and lining. A sheer curtain hung on a thin tension rod behaves completely differently from a lined custom linen curtains panel, which needs sturdier brackets and often a center support if the rod spans a wide window.
For bedrooms specifically, bedroom curtains usually need to handle two jobs at once: block light for sleep and still look good during the day. Blackout lining is common here, and it adds noticeable weight, so double-check your wall anchors can handle it before committing to a heavy blackout panel.
Living rooms tend to prioritize a different look. Curtains for living room spaces are often chosen for how they frame natural light and complement furniture, so floor-length panels in a lighter fabric are common, paired with a rod mounted higher and wider than the window itself for that fuller, more dramatic drape.
If you’ve measured your windows and nothing off-the-shelf fits, made to measure curtains are worth the investment. You’re paying for exact width, exact drop length, and often a choice of lining and heading style, which matters more than people expect once the curtains are actually hanging and catching the light differently than they imagined from a swatch.
And if you’re outfitting a whole house at once, working with a source for custom curtains across every room keeps the hardware, fabric weight, and finish consistent from room to room, instead of ending up with five different rod styles because each room’s curtains came from a different retailer.
Common Installation Mistakes and How to Avoid Them
Mounting too close to the window frame. This is the single most common mistake I see. It blocks light when curtains are open and makes the window look smaller. Give yourself at least 4 inches of clearance on each side.
Using the wrong anchor for the wall. A plastic anchor rated for 10 pounds won’t hold a heavy set of lined drapes on drywall. Check the weight rating on the anchor packaging against the combined weight of your rod and fabric.
Skipping the level. Even a quarter-inch difference in bracket height is visible once the rod is up and catching light from the window. Always check with a level, not your eye.
Ignoring rod sag on wide windows. Anything over 5 feet wide benefits from a center support bracket, especially with heavier fabrics.
Hanging too low. A rod mounted right at the top of the window frame instead of a few inches above it makes ceilings look lower and cuts off natural light when curtains are drawn back.
A Quick Comparison: Rod Types and What They’re Best For
| Rod Type | Best For | Weight Capacity | Notes |
|---|---|---|---|
| Tension rod | Sheers, cafe curtains, temporary setups | Light | No drilling, but not reliable for heavy fabric |
| Single rod with brackets | Most standard curtains | Medium to heavy | Most versatile option for permanent installs |
| Double rod | Layering sheers with custom made curtains or blackout panels | Medium to heavy | Great for bedrooms needing both light control and style |
| Traverse rod | Pull-cord opening, common in formal living rooms | Heavy | More complex install, good for wide curtains for living room setups |
| Decorative rod with finials | Statement pieces, exposed hardware | Medium | Choose finish to match room hardware |
How Long Does Installation Actually Take?
For a standard window with drywall and a stud nearby, expect 20 to 30 minutes per window once you have your tools out. Tile, brick, or plaster walls add time because of slower drilling and anchor prep — budget closer to 45 minutes to an hour per window if you’re working with those surfaces for the first time.
FAQ
How high above the window should a curtain rod be mounted? Most designers recommend 4 to 6 inches above the window frame, though mounting closer to the ceiling is common when the goal is to make the room feel taller.
Do I need to hit a stud to hang a curtain rod? Not always. A stud gives the strongest hold, but a properly rated wall anchor works fine for most standard curtains. Heavier fabric, like lined custom linen curtains, benefits from anchors rated well above the actual weight of the panels.
Can I install a curtain rod without drilling? Yes, with a tension rod, but it’s better suited to lightweight fabrics and temporary setups rather than a permanent installation with heavier panels.
How wide should the rod extend past the window? Generally 4 to 8 inches on each side, which lets curtains stack fully open without covering any part of the glass.
What’s the difference between made to measure curtains and standard sizes? Made to measure curtains are built to the exact dimensions of your window, including drop length and width, while standard sizes come in fixed lengths that may need hemming or simply won’t fit unusual windows properly.
Do heavier curtains need a different rod? Yes. Heavier fabrics, especially lined or blackout panels, need a sturdier rod, stronger brackets, and — on wider windows — a center support to prevent sagging.